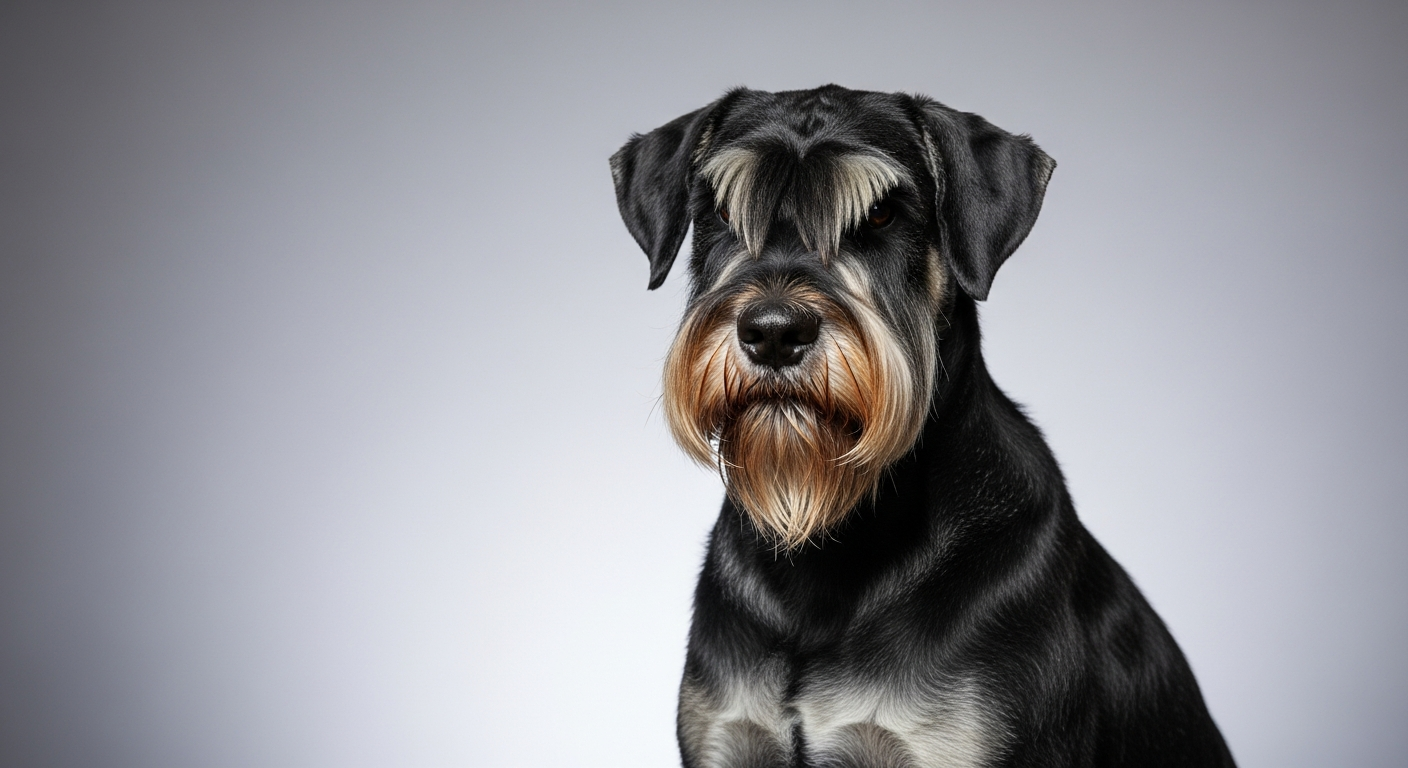
History & origins
The Giant Schnauzer is, at heart, a Standard Schnauzer scaled up for heavier work. According to the AKC breed standard and the Giant Schnauzer Club of America, the breed was developed in the mountainous cattle-country of Bavaria and the surrounding Alpine regions of southern Germany, where farmers wanted a larger version of the sharp, wiry Standard Schnauzer that could drive cattle to market. As the great cattle drives faded, the same rugged, watchful dog found new employment guarding breweries, butcher shops, and stockyards — protecting stock, premises, and cargo. Its intelligence, courage, and stamina later made it a favored police and military service dog.
That working history is not trivia — it is a direct map to the dog living in your home today. The territorial guarding instinct that watched the brewery gate is why a pet Giant Schnauzer notices every visitor and every change on its street. The stamina bred for all-day droving is why a walk around the block does not touch this dog's needs. And the independent problem-solving that let it work stock without constant direction is exactly why, left idle and confined, it will invent its own job — patrolling the fence line, barking at the window, or dismantling the couch.
The force-free takeaway: this is a breed engineered to work with a partner, not to be dominated by one. Give it a job, clear and predictable structure, and generous mental and physical outlets, and the working drive becomes an asset. Try to suppress it with force or “pack-leader” confrontation and you either shut the dog down or escalate the very guarding and conflict you were trying to prevent.
Quick answers
Short, focused guides for the questions owners actually search for.
Pro Principles
Set your expectations accurately and the rest of this guide gets easier. The Giant Schnauzer is a high-drive, intensely bonded, territorially protective working breed that is highly biddable but also genuinely willful. It learns fast — and it learns the wrong things just as fast. An under-stimulated Giant Schnauzer does not switch off; it promotes itself into a job you never assigned: patrolling the yard, reacting at the fence or window, barking down every visitor, or systematically taking apart your home.
The single most useful frame for this breed: a tired body is not a satisfied brain. Physical exercise alone will not settle a working dog. What settles it is work — problems to solve, tasks to complete, and clear, predictable structure it can rely on.
Enroll early with a certified force-free (LIMA) professional. A smart, powerful, guarding-inclined breed benefits enormously from a good trainer in the first months, not after problems appear. Look for credentials like CPDT-KA, KPA-CTP, or a Fear Free / IAABC affiliation, and confirm the trainer uses reward-based methods and refuses shock, prong, and choke tools. Your job between sessions is to provide daily mental and physical outlets and consistent structure — the same predictability the breed's working history was built on.
Force-Free Training: What It Is and Why It Works
Welcome. You are about to train your dog the kind way and the effective way at the same time. This guide uses only reward-based, LIMA methods. LIMA stands for Least Intrusive, Minimally Aversive — the standard endorsed by the American Veterinary Society of Animal Behavior (AVSAB, 2021), the AVMA, and the certification bodies for professional trainers (CCPDT/APDT). In plain terms: we build the behavior we want with rewards, and we manage the environment to prevent the behavior we don't. There are no choke, prong, slip, or shock collars here, no bark or citronella collars, no alpha rolls, and no ‘dominance’ or ‘pack-leader’ framing.
Why reward-based training works
Behavior that gets reinforced gets repeated. When your dog does something you like and a reward immediately follows — a treat, a game, permission to go sniff — you make that behavior more likely next time. This is how you actively build reliable skills: a recall the dog wants to do, a settle on a mat, a polite greeting. Reinforcement teaches the dog what to do, not just what to avoid, and it does so without fear getting in the way of learning.
Why aversive methods backfire
Punishment and aversive tools can suppress a behavior in the moment, but suppression is not learning — the underlying emotion is still there, and the tools carry well-documented fallout: more fear, more anxiety, damaged trust, and in many cases an increase in the very aggression they were meant to stop (this is why modern behavior science, AVSAB and APDT, rejects dominance/confrontational methods outright). A dog trained through intimidation often simply shuts down — it stops offering behavior at all because trying has become risky. Reward-based training is therefore both the ethical choice and the one that actually produces a confident, willing dog.
This guide is educational and is not a substitute for veterinary or in-person professional behavior advice.
How to Use This Guide
This is a complete, force-free curriculum that takes you from a new puppy through adult and advanced skills. Read this orientation and the safety material first, then work the phases roughly in order — but let your individual dog set the pace. Dogs don't read calendars; move forward when your dog is succeeding, not when the page says so. Breed-specific and body-type-specific safety (heat, airway, joints, climate) is covered in separate modules — read the ones that apply to your dog alongside this shared foundation.
The core promise
Kind, effective, and evidence-based. Everything here is reward-based and grounded in the site's vetted research corpus and mainstream veterinary-behavior guidance. You will never be asked to hurt, scare, or intimidate your dog to get results — because you don't have to.
A few habits that make every protocol work
- Keep sessions short, calm, and frequent. Two to four micro-sessions of just a few minutes each beat one long drill. Stop while your dog still wants more, and end on a win. High arousal and fatigue both raise the risk of mistakes — and, for some dogs, real physical risk — so keep the energy low and the sessions cool.
- Use a Y-front harness for any leash force — never collar pressure. Clip the leash to a well-fitted Y-shaped chest harness that keeps force off the throat. A flat collar is for ID tags only.
- Train the 3 Ds one at a time. Duration, Distance, and Distraction: raise only one at a time, and lower the others when you make one harder. Aim for about 80% success before you level up.
- Mark, then feed. A marker (a clicker or a crisp ‘Yes’) is a promise that a reward is coming, every single time — even if you marked by mistake. Mark the instant the behavior happens, then deliver the food.
- Generalize on purpose. Dogs don't automatically apply a skill learned in the kitchen to the park. Re-teach each behavior in new places, lowering your criteria each time you change the setting.
Set yourself up before your first session›
Step by step
- Fit a Y-front harness correctly (Y over the breastbone, straps clear of the armpits, two flat fingers fit snugly under each strap) and use a fixed 4-6 ft leash, not a retractable one.
- Pick one marker for the whole household — a clicker or a short, crisp 'Yes' — and use it consistently.
- Prepare pea-sized, soft, quick-to-swallow treats, and count them against the day's food so your dog stays lean.
- Choose a quiet, cool, low-distraction space for early sessions; add difficulty only once your dog is succeeding.
- Learn your dog's stress signals (lip-lick, yawn, looking away, freezing, refusing food) so you can spot 'too much' and back off before your dog goes over threshold.
- Keep every session short, end on an easy win, and follow training with rest.
0/7
Before You Start
Start with a vet baseline and a medical-rule-out mindset
Before any training begins, establish a relationship with a veterinarian and get a baseline wellness exam. Training assumes a healthy, comfortable dog — pain, illness, or poor vision/hearing can look exactly like "stubbornness," fear, or reactivity, and you cannot train your way out of a medical problem. A documented baseline (weight, body-condition score, a head-to-tail physical, age-appropriate parasite screening and vaccination plan per your vet) also gives you something to compare against later when something seems off.
Whenever you can, choose a low-stress / cooperative-care–minded practice. Your dog will visit the vet many times over its life, and a patient that is not terrified is a lifelong gift — for the dog, for you, and for the clinical staff.
0/5
Choose and fit a Y-front harness (collar is for ID only)
For anything that puts force on the leash — walks, long-line work, an excited lunge toward a squirrel — attach the leash to a well-fitted Y-front harness that loads the chest and breastbone, never the throat. A flat collar's only job is to hold ID tags; it is not a leash-attachment point for pulling. Pressure on the neck risks the windpipe, the delicate structures of the throat, and the spine, and it adds pain and fear to exactly the situations where you most want your dog calm.
Why a Y-front specifically
A true Y-front harness forms a Y over the breastbone (sternum) and sits clear of the armpits and the points of the shoulders, leaving the front legs free to move fully. Avoid designs with a strap straight across the front of the shoulders that restricts the gait. We use force-free equipment only: no choke chains, prong/pinch collars, slip leads, or shock/e-collars, ever — they work by pain or fear and damage trust without teaching the dog what to do instead.
Fit the harness (generic two-finger method)›
Step by step
- Measure before you buy: girth around the deepest part of the chest just behind the front legs, plus the base-of-neck/chest circumference, and check them against the maker's size chart. When in doubt between sizes, choose the adjustable option.
- Put it on with the dog standing. Confirm the front strap forms a Y over the breastbone, not flat across the throat or the front of the shoulders.
- Check the armpits: straps should sit roughly a finger's width behind the front legs so they never chafe or dig in as the dog moves.
- Run the two-finger test on every strap: you should be able to slide two fingers flat under each strap snugly. Looser than that and it can slip or twist; tighter and it restricts breathing and movement.
- Walk the dog a few steps and watch the front legs reach fully forward. No rubbing, no restricted stride, no riding up into the armpits.
- Re-check fit as a puppy grows or an adult's weight changes — a fit is not permanent.
0/6
Build a reinforcement history and find high-value rewards
Force-free training runs on a simple engine: behavior that gets reinforced gets repeated. Your job is to make the behaviors you want pay off, reliably and generously, while managing the environment so the dog rarely gets to practice the behaviors you don't want. Over many repetitions this builds a reinforcement history — a track record that makes "working with you" the dog's default because it has always been worth its while.
A marker makes your timing honest
Pick one marker — a clicker (most precise) or a short, crisp word like "Yes" (always available, hands-free) — and use it consistently across everyone in the household. The marker is a promise: it always means a reward is coming, every single time, even if you marked by mistake. Mark the instant the behavior happens, then deliver the food. The marker also tells the dog the behavior is finished, so your timing can pinpoint exactly what earned the reward.
Charge the marker›
Step by step
- Sit with a calm dog in a quiet, low-distraction spot. Load a pouch with 15–20 tiny, soft, pea-sized treats.
- Mark first, then feed: click or say "Yes," pause about half a second, then deliver one treat. The order matters — the marker must come before the food, never at the same time or after.
- Repeat 15–20 times. You're not asking for any behavior yet; you're just teaching that the marker predicts a reward.
- Test it: when the dog is looking away, make the marker sound. If the dog snaps to attention expecting a treat, the marker is charged.
- Keep it honest forever: every marker is always followed by a reward, and you never use the marker just to get attention or to call the dog.
Find what your dog actually values
A "reward" is only a reward if your dog would work for it — and the value is set by the dog, not by you. Build a personal reward hierarchy, from everyday to jackpot, so you can match the payoff to the difficulty. Easy behavior in the quiet living room can pay with kibble; the same behavior near a major distraction needs your best stuff. Reinforcers aren't only food, either — for some dogs a favorite toy, a game of tug, sniffing, or access to something they want can be high value.
- Everyday (low value): part of the dog's regular meal / plain kibble — great for easy reps in calm settings.
- Good (medium value): a step up the dog clearly prefers — for new skills and mild distraction.
- Jackpot (high value): the small, soft, smelly treats your dog goes wild for — reserved for hard work, scary or novel situations, and recall.
Keep treats tiny so you can do many reps, and count them against the day's food so the dog stays at a healthy weight. Use part of the daily ration plus a few high-value bits rather than piling extra calories on top.
Run short, low-arousal sessions
Learning happens in a calm, thinking brain. A dog that is over-excited, over-tired, frustrated, or stressed is in a reacting state, not a learning state — so the format of your sessions matters as much as the content. Keep sessions short, cool, calm, and low-arousal, and end while the dog still wants more. Several tiny wins sprinkled through the day beat one long drill, because high arousal makes mistakes and fallout more likely and is harder for the dog to recover from.
0/6
Learn the stress-signal ladder so you can lower criteria in time
Dogs communicate discomfort constantly, long before anything dramatic happens. Learning the stress-signal ladder is the single most important foundation skill, because every later protocol depends on it: the moment you can see stress rising, you can lower the difficulty, add distance, or stop — keeping the dog under its threshold, where it can still learn. Read signals as whole-body clusters in context, not one twitch in isolation, and learn your individual dog's baseline so you notice when it changes.
Low rungs — early / appeasement signals (catch these)
These are polite, low-cost requests for a little more space: lip-licks or tongue-flicks with no food present, yawning when not tired, looking away or turning the head, blinking, a raised paw, ears going back, sudden out-of-context sniffing or scratching, or a full-body shake-off (a tension-reset). They are not misbehavior, stubbornness, or "guilt" — they're the dog asking you to ease off. Acting now prevents escalation later.
Middle rungs — clearer distance-increasing signals
The dog is shifting from coping to reacting: a stiff or frozen body, weight braced, a hard fixed stare, a tight or suddenly closed mouth, low or tucked tail, body lowering or leaning away, and — critically — refusing food it would normally take. Food refusal in a normally food-motivated dog is your single best "this is too much" alarm: the dog is over threshold and no longer able to learn.
Top rungs — overt warnings
Growl, snarl, snap, and finally a bite. A freeze or hard stare is a serious stop sign that can immediately precede a snap.
Practice reading and responding›
Step by step
- Learn to name the low rungs first — lip-lick, look-away, yawn, shake-off — because they're fast and easy to miss but the cheapest to act on.
- Watch your dog daily in calm moments and "narrate" out loud what you see, so reading signals becomes automatic before you need it under pressure.
- Film short clips of your dog in mild novelty and review them in slow motion — signals you miss live are obvious on replay.
- Adopt the universal rule: the instant you see stress escalating, you are over threshold — calmly add distance or make it easier, then reset.
- Treat food refusal and any freeze as a hard stop: end the exposure and give space immediately.
- Teach everyone in the household the same signals so the dog gets consistent, safe responses from all people.
Threshold›
The point at which a dog tips from coping and able to learn into over-aroused or stressed and unable to learn. Good force-free training keeps the dog under threshold — close enough to a distraction or trigger to notice it, but far/easy enough that it can still think, eat, and respond. When signals climb the ladder, you've crossed it; create distance or lower criteria.
Protect the Growing Skeleton: Joints & Growth Plates
A large- or giant-breed puppy grows fast and finishes slowly. At the ends of the long bones sit growth plates (physes) — soft cartilage zones where the bone is still lengthening. Until they harden and close, they are the weakest link in the skeleton, more vulnerable to injury than the mature bone or the surrounding ligaments will later be. The bigger and heavier the breed, the longer this window stays open and the more load that immature frame is carrying while it does.
Growth-plate closure timing is approximate and varies by individual, breed, and size — as a rough guide the plates of larger dogs are generally still maturing through roughly 10-14 months, and the biggest giant breeds can run later still. The practical takeaway does not depend on an exact date: during the whole growth period, protect those joints from forced, repetitive, high-impact loading, and let your dog grow into a sound adult before you ask its body to work hard.
What to limit while your dog is growing
The goal is plenty of gentle, varied, self-paced movement and very little forced, repetitive, jarring movement. Free sniffing, pottering, and exploring on soft, level ground should not be rationed — that is low-impact and good for body and brain. What you cap is the high-impact, joint-loading activity:
- Repetitive jumping — on and off furniture, in and out of the car, repeated fetch leaps, or jumping for toys held overhead.
- Forced or sustained running — jogging or cycling alongside you, or long forced marches that your puppy cannot choose to stop.
- Stairs, taken repeatedly. Occasional careful stair use is one thing; letting a growing big dog race up and down flights as a daily habit is repetitive concussion on open growth plates. Carry or gate small pups off stairs where practical, and supervise the rest.
- Slick floors. Tile and hardwood let a heavy, gangly puppy's legs splay and slip — an orthopedic hazard. Put down runners and non-slip mats on the routes your dog uses most.
How much exercise, then?
A common rough rule of thumb is roughly five minutes of structured exercise per month of age, once or twice a day — so a 4-month-old gets only short outings. Treat this as a non-evidence-based starting point, not a law: it is a reminder to err low, not a quota to hit. Let the dog's own pace, interest, and recovery guide you, and add free sniffing time freely on top. Build muscle and coordination, not mileage — controlled, low-impact movement on good footing protects the joints far better than distance does.
0/8
Growth plate (physis)›
A soft cartilage zone near the ends of a young dog's long bones where the bone is still lengthening. It is softer and more injury-prone than mature bone until it hardens and 'closes,' which in larger breeds is approximately the 10-14-month range (later in some giant breeds) — varying by individual. While plates are open, repetitive high-impact loading (jumping, forced running, repeated stairs) carries extra risk.
Build Manageable Strength Early (Before Your Dog Is Strong)
With a large or giant breed you are training on a deadline the puppy doesn't know about: it will be physically stronger than you long before it is mentally grown up. A behavior that is merely annoying in a small, light puppy — pulling toward another dog, lunging at a smell, bracing at the door — becomes genuinely hard to manage once the same dog outweighs a child and can move you off your feet. The fix is not more force later; it is installing calm, cooperative habits now, while the dog is small enough that gentle equipment and good timing are all you need. A big dog must be controllable on a harness before it is strong.
Train the leash skills before the strength arrives
Loose-leash walking is far easier to build than to fix. Every time a puppy pulls and the walk continues, pulling gets rewarded — and that habit only gets harder to undo as the dog gains power. Start now, at home, with a tiny, light puppy, so the pattern is set long before the dog could drag you anywhere.
Loose-leash foundations for a future-big dog›
Step by step
- Condition the harness first: let your dog eat treats around it, then wear it for a few relaxed minutes indoors before you ever attach a leash, so the gear itself predicts good things.
- Use a fixed 4-6 ft leash clipped to the Y-front harness — no retractable leashes, which teach constant tension.
- Reward position, not pulling: the instant your dog is beside you or the leash is slack, mark and feed at your leg so being near you pays better than forging ahead.
- If the leash goes tight, stop moving (be a 'tree') or quietly change direction. Pulling never advances the walk; slack does.
- Keep first sessions short, calm, and in a boring, low-distraction spot; raise difficulty only when your dog succeeds about 8 out of 10 reps.
- Practice politely loading and unloading from the car and doorways on a slack leash too — these are high-arousal moments where a strong adult dog is hardest to hold.
Calm at thresholds and around triggers
The moments that get dangerous with a powerful adult are the high-arousal ones: the front door, the car, the sight of another dog. Teach impulse-control basics early — a default sit before doors open, 'wait' before meals and before exiting the car, an easy hand-target to move the dog's attention back to you, and a reliable name response. Each of these gives you a calm, trained behavior to ask for instead of a wrestling match later. Keep sessions short (a few minutes), cool, and low-arousal; a wound-up dog can't learn, and high arousal is exactly the state you don't want to rehearse in a breed that will soon be strong.
0/7
New Puppy (8–12 wks)
Charging the Marker (Clicker or "Yes")
A marker is a single, consistent sound that means one exact thing to your dog: "that — what you just did — earned a reward." Marker-based training is the backbone of force-free, reward-based (LIMA) teaching endorsed by the American Veterinary Society of Animal Behavior (AVSAB, 2021). The marker lets you pinpoint the precise instant a behavior happens, even when your hands are busy and the food is a half-second away.
Pick one marker for the whole household: a clicker (most precise, distinct from everyday speech) or a short, crisp "Yes" (always available, frees your hands). Don't mix them, and don't change it later.
Load ("charge") the marker›
Step by step
- Sit with a calm dog in a quiet, low-distraction room. Load a pouch with 15-20 pea-sized, soft treats (count them against the day's food ration so you don't overfeed).
- Mark FIRST, then feed: click / say "Yes" → wait a half-second → deliver one treat to the dog. The order is everything — the sound must come BEFORE the food appears, so the sound predicts the food.
- Repeat 15-30 reps. The dog does not need to do anything yet; you are only building the association "that sound = food is coming."
- Test it: when the dog looks away, mark once. If the head whips back toward you expecting a treat, the marker is charged.
- Now begin marking tiny good things — a glance at you, four paws on the floor, a spontaneous sit — and feeding each time.
- Add a release word ("Free" or "Okay") to signal a behavior is finished and the dog can move.
Mark the behavior, not your hand reaching for the food. If you move your treat hand first, the dog learns to watch your hand (a bribe), not to offer behavior. Click/"Yes" with a still body, then reach.
0/5
Name Response & Attention
Your dog's name should mean one simple, happy thing: "orient to me and check in." It is a check-in cue, not a command — teach a separate cue for recall ("come") and another for movement. Used well, the name becomes the first link in every other skill, because attention has to come before instruction.
The Name Game (four stages)›
Step by step
- Stage 1 — pairing: say the name once, happily, then mark and feed, no matter what the dog is doing. Repeat 8-10 times so the name simply predicts good things.
- Stage 2 — orienting: say the name once and WAIT. The instant the dog looks at you, mark and feed generously. No response within about 2 seconds? Don't repeat the name — make a kissy noise or soft sound, mark the look, and make the next rep easier.
- Stage 3 — mild distraction: step a foot away, or move to a new room, say the name once, mark the look, treat. Add gentle distractions only as the dog keeps succeeding.
- Stage 4 — proofing: practice in the yard, then in quiet outdoor spots, always paying well. Behaviors don't generalize automatically — re-teach the name in each new place.
0/4
Bite Inhibition & Redirecting Mouthing
Puppy mouthing is normal, necessary developmental behavior — not aggression and not "dominance." The goal of this stage is bite inhibition: teaching a soft mouth so that, even years later, if your dog ever does put teeth on skin under stress, it does little or no damage. This is the classic two-phase approach popularized by veterinary behaviorist Dr. Ian Dunbar: first eliminate painful pressure, then reduce frequency. You teach soft before you teach zero.
Build a soft mouth, then less mouth›
Step by step
- Stage 1 — stop the hardest bites: when a bite genuinely hurts, react with a calm, brief withdrawal of attention. Go still and boring, or briefly disengage for 5-20 seconds. The hard bite ends the fun. Then offer a chew to redirect.
- Watch how your dog reacts to a yelp: a sharp "Ouch!" calms some pups but ESCALATES others (it can act like a squeaky-toy noise). If yelping winds your dog up, drop it entirely and use calm, silent disengagement instead.
- Prefer a brief pause — step back a few feet, or use a tether/pen for a few seconds — over leaving the room, especially with a young pup who may panic at being left alone. Reserve longer separations for rare cases.
- Stage 2 — reduce all pressure: once the hardest bites stop, start reacting to progressively softer bites, so the dog learns that human skin is delicate and even gentle pressure ends play. Aim for feather-light mouthing well before the adult teeth arrive (around 4-5 months).
- Stage 3 — teach "Off": hold a treat in a closed fist, say "Off," and the instant the dog stops mouthing for one second, mark and let it "Take it." Slowly build duration.
- Stage 4 — redirect to toys: keep approved chews within reach. When mouthing starts, calmly redirect to the toy and reward chewing the right object. Reinforce calm, four-on-the-floor behavior with your attention.
0/5
Early Socialization (The Sensitive Period)
Puppies move through a sensitive period for socialization roughly from 3 to 14 weeks, when they most readily form lasting positive (or negative) associations with the world. Per the AVSAB position statement on puppy socialization, this is the single most important window for behavioral health — and behavioral problems from under-socialization cause far more young dogs to be surrendered or euthanized than infectious disease does. The job is quality, not quantity: many brief, positive, dog-chosen exposures, never overwhelming ones.
Socialize across categories, not just "meet dogs." Aim for gentle positive experiences with: different people (varied ages, sizes, appearances, beards, hats, uniforms), friendly vaccinated dogs, surfaces and textures (grass, tile, metal grates, wobbly things), sounds (traffic, vacuums, thunder recordings at low volume), handling, and novel environments and objects.
Make every exposure a good one›
Step by step
- Confirm safety first: socialize only when the puppy is healthy and following its veterinarian's guidance on the vaccine series — on clean, controlled surfaces and with known healthy, vaccinated dogs until the series is complete. (See the socialization-window guidance from your vet.)
- Start at LOW intensity: reward the puppy for noticing a new thing from a comfortable distance or at low volume FIRST, then decrease distance / raise volume only while the puppy stays relaxed and keeps eating (this is desensitization plus counterconditioning).
- Let the puppy CHOOSE to approach. Reward investigation. Never drag, lure, or force a worried puppy into contact, and never let people or dogs crowd it.
- Keep exposures short and frequent — several brief, positive moments a day beat one big outing.
- Practice startle-and-recover: when something surprises the puppy, stay calm, give it room to investigate, reward the recovery, and resume. Bouncing back is the skill you're building.
- Do happy, low-pressure visits to places it will go for life (e.g., the vet): walk in, treats, a friendly hello, leave — nothing scary happens.
- Track exposures on a checklist so you can spot gaps before the window narrows.
A well-run, force-free, vaccine-screened puppy class is an excellent blend of safe socialization, handling practice, and early skills. Read the body-language module so you can keep every exposure under threshold.
0/5
House-Training Mechanics
House-training is management plus reinforcement — never correction. You prevent indoor "rehearsal" by supervising and confining, and you build a strong habit by richly rewarding elimination in the right place at the right moment. Punishment has no place here: it teaches a dog to hide where it goes (including from you), not to hold it.
The routine›
Step by step
- Take the puppy out — on leash, to ONE chosen spot — on every trigger: on waking from every nap, within about 10-15 minutes after meals, after play or training, after any excitement, and any time it starts sniffing or circling.
- Between triggers, offer a default opportunity often. A young puppy typically needs out every ~90 minutes to 2 hours; do not stretch this in early weeks.
- Treat the common "age in months + 1 = hours it can hold" formula as a theoretical UPPER bound only, never a target to push toward.
- At the spot, stand still and quiet. As elimination begins, say a calm cue ("go potty") so the word attaches to the act.
- The instant the puppy FINISHES, mark and treat within about 2 seconds — outside, on the spot. Do not wait until you're back indoors.
- If it doesn't go, return to the pen/crate for 10-15 minutes, then try again. No free roam on an empty bladder.
- Supervise 100% when the puppy is loose (tether it to you), or confine it when you can't watch.
- Clean every accident with an enzymatic cleaner (ordinary cleaners leave a scent cue that invites a repeat); keep the puppy out of the room while you do.
0/5
Crate & Confinement as a Positive Safe Space
A crate or pen, conditioned kindly, gives your dog a den-like safe space and gives you a humane way to prevent house-training accidents and destructive rehearsal when you can't supervise. The non-negotiable rule: confinement must be built as something the dog chooses and enjoys, never something forced, and never used as punishment. Some dogs do better with an open ex-pen or a gated, dog-proofed room than a closed crate — watch your individual dog's tolerance from day one.
Size a crate so the dog can just stand, turn around, and lie down comfortably; use a divider that grows with a puppy. Too large and a puppy will soil one end and sleep in the other, undermining house-training.
Condition the crate or pen step by step›
Step by step
- Awareness: prop the door open (or leave the pen open), add soft bedding and a chew, and casually drop treats inside so the dog keeps "discovering" good things in there.
- Entry: feed meals inside with the door open. Mark the moment the dog steps in and toss a treat to the back. If it leaves, that's fine — don't lure it in or shut it in.
- Door in inches: once the dog enters eagerly, close the door just 1-2 inches, reopen, reward. Build gradually to a full, quiet close and an immediate reopen.
- Duration: feed through the door while the dog is calm, starting at seconds and building to minutes with a stuffed or frozen food toy. Release calmly — low-key, not a party.
- Distance: only after duration is solid, add stepping away and returning. Change one variable at a time.
- Keep exits low-key so "getting out" isn't the most exciting part of the crate.
0/5
Protecting Sleep & Capturing Calm
This is your first intervention for most puppy chaos. Young puppies need a great deal of sleep — commonly cited at around 18-20 hours a day for an 8-12-week-old — and they do not reliably self-regulate it. The frantic zoomies, the escalating mouthing, the "ignoring cues it knows," the wired-and-can't-stop behavior are usually signs of an over-tired puppy, not one that needs more activity. Treat sleep as a need you actively manage.
Enforce naps; reward calm›
Step by step
- After roughly every 1-2 hours of wake time, guide the puppy to a calm rest space (covered pen or open crate with a chew) for a nap — even if it protests briefly out of fear of missing out.
- Learn the over-tired tells: frantic zoomies, escalating biting, getting "wired," ignoring known cues. Read these as "needs a nap," not "needs more exercise."
- Keep the rest space quiet, dim, and comfortable; white noise helps in a busy home.
- Schedule training right AFTER a nap, when the puppy is fresh and able to learn.
- Capture calm: whenever the puppy lies down quietly on its own, calmly drop a treat between its paws without exciting it — reward the off-switch you want more of.
0/5
Intro to Cooperative-Care Handling
Cooperative care teaches your dog to participate in handling, grooming, and veterinary procedures rather than merely endure them. Started early and kept positive, it produces a dog that stays relaxed for exams, nail trims, ears, teeth, and restraint — a lifelong gift, since a calm patient is safer and gets better care. The core idea is consent and choice: the dog gets a way to say "go ahead" and a way to say "pause," and you honor both.
Build handling tolerance and a consent signal›
Step by step
- Pair brief, pleasant touch with treats: stroke the shoulders and back — touch, then treat — keeping the dog relaxed throughout.
- Add body parts in short sessions: ears (and inside the flap), muzzle and lips (lift to view teeth), paws and individual toes/nails, tail and rear, and belly. Touch briefly, mark, treat; build duration slowly.
- Teach a consent / start-button behavior: a chin rest in your palm (or a settle on a mat) that means "I'm ready." If the dog lifts its chin or moves away, you STOP immediately. Giving the dog control reduces struggling and fear.
- Introduce tools positively: show a nail clipper or grinder, touch it to a nail with no cut, mark and treat; let the dog hear a running grinder from a distance; do the same with a brush, ear wipe, eye wipe, and a capped syringe.
- Counter-condition gentle restraint: a 1-second hold → treat → release, building to a few seconds, including the side-lying / 'hug' hold used at the vet.
- Progress nails slowly — one nail 'touch' or tip per day with jackpot rewards — long before attempting full trims.
- Generalize to other handlers and, via happy visits, to grooming and vet staff.
0/5
Early Neutral-Stranger Socialization for the Watchful Dog
Some dogs are wired to notice, watch, and announce — they bond closely to their own people and are naturally reserved or alert toward strangers and changes on their turf. This is a temperament, not a flaw, and it is not something you train away. Your job in the first weeks is to teach this dog, early and at low pressure, that new people and new places are ordinary and safe — so that watchfulness stays as calm awareness and never curdles into fear-driven wariness.
The single most important idea for a watchful dog is neutrality, not friendliness. You are not trying to make your dog love every stranger or rush up to greet them. You are teaching the dog that a stranger can simply exist nearby while nothing happens, and that this is boring and fine. A dog that has learned "strangers mean calm and space" is far safer for life than one that was pushed to over-greet and then felt cornered.
Reward calm and neutral, not excitement. Watch your dog notice a stranger and stay relaxed, then mark and pay that — the soft body, the glance back at you, the choice to keep walking. You are deliberately reinforcing a calm emotional state, because for this temperament calmness around novelty is the skill that protects everyone. Keep sessions short, cool, and low-arousal; arousal alone raises stress and risk, so a wound-up dog cannot learn here. Let the dog set the pace and choose to approach or not — never drag, lure, or hand the dog to a stranger.
Build calm-around-strangers from a safe distance›
Step by step
- Pick a spot where you can watch people pass at a distance the dog is comfortable with — relaxed body, still taking food, not staring or stiffening. That distance is your starting line; respect it.
- The moment your dog notices a person, calmly mark and feed. The person appearing predicts good things and no demands. You are pairing 'stranger in view' with 'calm and a treat' (classic desensitization plus counterconditioning).
- Keep each rep tiny. A few relaxed glances, then move along before the dog tires or tips over threshold. End while it is still easy.
- Only decrease the distance once the dog is loose and happily eating at the current one. Close distance gradually across many short sessions, never in one push.
- Let any greeting be the dog's choice and keep it brief — a few seconds, then move apart and reward the dog for disengaging and coming back to you. Do not let strangers loom over, reach over the head, or corner the dog.
- If the dog stops eating, stiffens, or wants to leave, you are over threshold: calmly add distance and make it easier. Refusing food it normally takes is the single best 'too much' alarm — back off, don't push through it.
0/6
Manage Alerting Without Corrections — and Never Punish a Warning
A watchful dog will alert — barking at the door, the window, the fence, the unexpected visitor. The instinct is to suppress it with a correction. Don't. For this temperament you manage the situation with environment and reinforcement, never with corrections, because punishing a tense, aroused dog adds fear to a moment that is already over threshold and makes the underlying wariness worse, not better.
The tool is management — gates, not corrections. Use baby gates, exercise pens, closed blinds, and distance to control what your dog has access to and rehearses, so the dog simply does not practice frantic territorial barking until you have built a calmer response. Prevention beats correction every time: a behavior the dog never rehearses is far easier than one you have to undo.
Manage territorial alerting kindly›
Step by step
- Reduce the triggers the dog rehearses: close or frost the blinds on a window the dog patrols, and use a gate to keep the dog back from the front door during arrivals.
- Acknowledge, don't scold. When the dog alerts, calmly thank it ('thank you'), then redirect to you and reward moving away from the trigger. The alert gets a job — check in with the human — instead of a punishment.
- Pre-empt known events. For expected arrivals or deliveries, manage with a gate and a stuffed chew in a calmer room so the dog has something to do other than guard the threshold.
- Reward the quiet, calm choice heavily — the dog that notices and then settles, looks at you, or walks away is doing exactly what you want. Capture and pay calm relentlessly.
- Keep arousal down. A dog that is already wound up cannot make good choices; lower the intensity, add distance, and keep sessions short and cool.
Use a Y-front harness, never collar pressure, for any leash work. A reserved dog on lead near a trigger needs you to be able to add gentle distance without choking or jolting it — pressure on the neck spikes arousal and pain and can turn a manageable moment into a defensive one. A flat collar is for ID only.
Foundations (12–16 wks)
How Dogs Learn the Core Cues: Luring, Shaping & Capturing
Before teaching any single cue, it helps to understand the three force-free ways to get a behavior in the first place. Every cue in this section uses one (or a blend) of them. None involves pushing, pulling, or pressuring the dog into position — you simply make the right answer easy and then pay for it generously. This reward-based approach is the standard endorsed by the American Veterinary Society of Animal Behavior (AVSAB, 2021) and is both the kindest and the most effective way to train a companion dog.
The three ways to get a behavior
- Luring — you guide the dog into position by letting it follow a treat held at its nose (e.g. lifting a treat up and back to get a sit). Fast to start, but the lure must be faded early so it doesn't become a permanent bribe.
- Capturing — you simply wait, and the instant the dog offers the behavior on its own (lies down, sits, makes eye contact), you mark and reward. Great for calm behaviors and for building a strong 'default.'
- Shaping — you reward successive approximations, paying for each small step toward the finished behavior (a glance at a mat, then a paw on it, then lying on it). Builds confident, thinking dogs.
Fade the lure early, name the cue last
This sequence keeps you from ending up with a dog that only works when food is visible:
- Lure for just 3–5 repetitions.
- Switch to the same hand motion with an empty hand, and reward from the other hand or your pouch.
- Shrink the gesture into a small hand signal.
- Only once the behavior is reliable, add the verbal cue, said once, just before the hand signal — the word then takes over.
Visible food held out forever is a bribe, not a cue. Say a cue only once per repetition; repeating it ("sit, sit, sit") just teaches the dog the word is background noise.
Setting Up Sessions for Success
How you structure a session matters as much as the technique. Dogs learn best in short, calm, frequent bursts with a high rate of reward — not in long drills. Keep arousal low: a wound-up dog can't think, and an over-tired one can't either.
0/6
Sit
Sit is the easiest first cue and a useful default for greetings, waiting at doors, and clipping on a leash. Teach it by luring, then fade fast to a hand signal and finally a word.
Teach a lured sit›
Step by step
- With the dog standing, hold a treat right at its nose.
- Slowly raise the treat up and back over the dog's head. As the nose follows up, the rear naturally lowers.
- The instant the rear touches the floor, mark ("Yes"/click) and feed at the dog's chest level so it stays put.
- After 3–5 reps, do the identical motion with an empty hand (a palm-up sweep) and reward from the other hand.
- Shrink the gesture into a small palm-up hand signal.
- Once the signal is reliable, add the word "Sit" once, just before the signal. The word becomes the cue.
- Re-teach in new rooms, then the yard, lowering your expectations in each new place — dogs don't generalize automatically.
Down
Down is the foundation for settling and for any longer stay. Lure it onto a soft surface — many dogs are reluctant to lie on cold, hard, or slippery floors, and that reluctance can be mistaken for stubbornness.
Teach a lured down›
Step by step
- Start from a sit or a stand. Hold a treat at the dog's nose.
- Lower the treat straight down to the floor between the front paws, like an elevator.
- If the dog stays up, slide the treat slowly toward you along the floor so it follows down into the position.
- The instant the elbows touch the floor, mark and feed on the floor between the paws to reinforce staying down.
- After 3–5 reps, fade to an empty-hand point toward the floor; reward from the other hand.
- Once reliable, add the word "Down" once, just before the hand signal.
- Practice on a mat or rug first; generalize to other rooms and surfaces gradually.
Stand
A trained stand is an underrated life skill: it lets you towel a dog dry, brush its belly, harness it, and let a veterinarian or groomer examine it without wrestling. Lure the dog forward into a stand rather than upward.
Teach a lured stand›
Step by step
- From a sit or down, draw a treat straight forward and slightly up, away from the dog's nose.
- As the dog steps forward to follow and plants all four feet, mark and reward by feeding forward (so it doesn't fold back down).
- Repeat, then fade the lure to a flat hand drawn forward.
- Once reliable, add the word "Stand" once, just before the hand motion.
- Build a brief hold so the dog can be handled, examined, or dried while standing.
Settle: A Relaxation Protocol & Off-Switch
Of every skill here, a trained "settle" may pay the biggest lifelong dividend. It teaches the dog that calm is a behavior that gets rewarded — an off-switch for cafés, vet waiting rooms, visitors, and ordinary evenings at home. The key difference from "down": you are rewarding genuine relaxation, not just the position.
Build settle on a mat›
Step by step
- Capture calm first: whenever the dog lies down quietly on its own anywhere, calmly drop a treat between its paws without exciting it.
- Introduce a dedicated mat or bed. Reward any interaction — a look, a step on, lying on it — shaping toward lying down on the mat.
- Once the dog lies on the mat, feed low-value treats slowly, one at a time, to reward staying.
- Now mark RELAXATION, not just the down: a hip rolled to one side, head lowering, a slow tail, soft eyes, a sigh. Deliver treats calmly and low to the floor.
- Build duration by gradually increasing the time between treats; then fade food to quiet praise.
- Add a soft cue like "Settle" or "Relax" once relaxation is reliable.
- Generalize to new rooms and to mildly busy moments (TV on, people moving around).
Leave-It & Trade (Drop-It)
These two cues are genuine safety skills — a reliable "leave it" can stop a dog from eating something dangerous off the ground, and a happy "drop" gets objects back without a chase. Both are taught entirely by trading up, never by prying, grabbing, or chasing, which only teach a dog to guard, gulp, or run. Keep them distinct: leave it means "don't take that"; drop it means "release what's in your mouth."
Teach leave-it›
Step by step
- Level 1: Hold a treat in a closed fist. Let the dog sniff, lick, and paw at it. The instant it gives up and backs off or looks away, mark and reward from the OTHER hand.
- Level 2: Put a treat on the floor under a flat hand. Reward the dog for backing off; uncover it only once the dog reliably ignores it.
- Add the cue "Leave it" once the dog consistently disengages — say it as the dog turns away.
- Progress to food on the floor you can cover if needed, then to dropped food while walking — always paying from your hand, never letting the dog take the forbidden item.
- Proof with gradually higher-value temptations at a safe distance before expecting success up close.
Teach drop-it (trade)›
Step by step
- Play with a low-value toy. Offer an equal-or-better treat or a second toy and say "Drop it" as the dog's mouth opens.
- Mark and reward the release — then OFTEN hand the toy right back, so dropping doesn't end the fun.
- Reward "drop it" every single time with something equal or better, so the cue stays valuable.
- Keep two identical toys handy for fast, low-friction repetitions.
- Generalize to real objects the dog picks up around the house.
Recall Foundation: Coming When Called
Recall is built as a game and protected like treasure. The goal at this stage is a fast, happy turn-and-come indoors and in the yard. Reliability outdoors and around distractions is built later, on a long line — but the foundation is laid now, and the most important rule is simple: coming to you must always pay, and must never predict anything the dog dislikes.
Foundation recall games›
Step by step
- Charge the recall word indoors: say "Come!" once, take a few steps backward to invite the chase, mark the moment the dog commits to you, and jackpot (several treats) when it arrives at your legs.
- Play calm ping-pong: two people about 10–15 feet apart take turns calling once, marking the commitment, and paying at their legs. Keep the pace relaxed — this is a happy game, not a sprint drill.
- Use a Premack reward: call the dog away from something mildly fun, reward it, then release it BACK to the fun as a bonus. The dog learns that coming doesn't end good things.
- Play the harness-grab game: reach for and touch the harness, then feed — so a hand reaching for the dog always means good things, never the end of freedom.
- Reserve a separate emergency word (paired with about 10 rapid treats in a row) that you use rarely, so it never loses its power.
Loose-Lead Walking: Indoor Mechanics First
Polite leash walking is a mechanical skill best learned indoors, with no distractions and no destination pulling the dog forward. The single principle behind all of it: a tight leash never earns forward progress. Pulling has to stop working before walking nicely can start.
Build loose-lead mechanics indoors›
Step by step
- Set up with a Y-front harness, a fixed 4–6 ft leash (no retractable), and treats held on your walking side.
- Take ONE step, then mark and feed at your side before the dog forges ahead. Repeat for many single steps with a very high rate of reward.
- Build to 2, then 3 steps per mark; then randomize (1, 5, 2, 4 steps) to keep the dog engaged and guessing.
- If the leash ever goes tight, STOP moving. Wait, encourage the dog back to your side, then take 2–3 steps before feeding — so the dog learns 'walking near you pays,' not 'pull, come back, get a treat.'
- Optional: when the dog forges, calmly turn and walk the other direction, and reward when it catches up to your side.
- Add a "go sniff" release as a real reward — letting the dog sniff is powerful, keeps it relaxed, and is a calmer activity than fast walking.
Raising Criteria: The 3 Ds (Duration, Distance, Distraction)
Once a dog can do a behavior in your quiet kitchen, you still have to make it real-world reliable. You do that by raising difficulty along three separate dimensions — the 3 Ds — and the cardinal rule is to raise only one at a time while keeping the other two easy. Push two at once and the behavior usually falls apart.
The three dimensions
- Duration — how long the dog holds the behavior (e.g. staying in a down). Build seconds gradually, returning to reward, before adding anything else.
- Distance — how far you can move away, or how far the behavior happens from you. Add steps slowly; lower duration when you first step back.
- Distraction — what else is going on around the dog (people, other dogs, food, noise, new places). This is usually the hardest D — start with mild distractions far away.
How to level up cleanly›
Step by step
- Pick ONE D to raise. Keep the other two easy.
- Make the increase small — a couple of extra seconds, a single step, a slightly busier room.
- Aim for roughly 80% success at the current level before making it harder.
- If the dog fails twice in a row, you raised it too fast — drop back to the last level where it succeeded and rebuild.
- When you add a hard new D (like a big distraction), temporarily make the others easier to keep the dog winning.
- Re-teach the behavior in genuinely new places — dogs do not generalize automatically; a perfect sit at home is a brand-new lesson at the park.
The 3 Ds›
Duration, Distance, and Distraction — the three independent ways to make a known behavior harder. The working rule for raising criteria: increase only ONE at a time, lower the others when you do, and aim for about 80% success before the next step up.
Adolescence (4–12+ months)
Adolescence: Expect Regression and Stay the Course
Adolescence is the teenage stage of dog development, and it is where most dogs are surrendered to shelters. Around this period you can expect known cues to get flaky, recall to weaken, sensation-seeking and reactivity to rise, and any early guarding or separation worries to resurface as the dog approaches social maturity. None of this is defiance or spite — it is normal neurological development. Your job is not to crack down; it is to maintain, manage, and re-proof with patience.
The single most useful mindset: when a behavior falls apart, drop your criteria rather than escalate pressure. Lower the difficulty, go back to easier contexts, raise the value of your reward, and rebuild. Punishing regression damages trust at exactly the moment your dog needs your guidance most.
Surviving adolescent regression — the maintenance plan›
Step by step
- Expect it. As your dog matures, trained cues will get unreliable and recall will weaken. Write down your success criteria so you can SEE progress through a frustrating stage.
- When a cue falls apart, DROP CRITERIA: lower the three Ds (duration, distance, distraction), return to an easier context, raise reward value, and rebuild from there.
- Keep maintenance reps on every important cue — recall, settle, leave-it, loose-leash — so they don't quietly decay.
- Re-run long-line recall as if it were brand new. Never trust off-leash reliability during adolescence.
- Manage the environment heavily — gates, leashes, long lines — so your dog can't rehearse unwanted behavior while its impulse control is offline.
- Protect rest and keep sessions short; adolescent dogs still fatigue quickly. Stay warm and patient. This stage passes — ride out the non-linear setbacks.
Secondary Fear Periods: Read Behavior, Not the Calendar
Adolescent dogs can pass through one or more periods of heightened fear sensitivity, when things they previously took in stride suddenly seem alarming. The exact timing is individual — so respond to your dog's behavior, not to a date on the calendar. The goal is to keep your dog meeting the world while gently lowering intensity, because withdrawing from life entirely (under-exposure) creates its own lasting problems.
Two extremes both backfire. Flooding — pushing a frightened dog into a scary situation "to get over it" — can create lasting fear, especially during a sensitive window. Total avoidance teaches the dog the world stays scary. The middle path is to keep exposing, just gentler: add distance, lower the volume or intensity, and reward recovery.
Managing a fear period humanely›
Step by step
- Watch for new wariness toward previously neutral things. Don't dismiss it and don't dramatize it — just notice it.
- When your dog shows fear, ease off the exposure: increase distance, turn down the intensity, and give the dog room to choose how close to get.
- Keep exposing at a level the dog can handle. Manage intensity rather than withdrawing from the world entirely.
- Never force or lure a frightened dog into the trigger. No flooding — let the dog approach on its own terms.
- Use known, easy, rewarding behaviors (a hand target, a 'find-it' scatter) to rebuild confidence in the moment and give the dog something to DO.
- Practice startle-and-recover: stay calm, give space to investigate, reward the recovery, then resume. End every exposure on a success the dog can handle.
Re-Proofing Stay Through the Three Ds
A reliable "stay" is built by raising one variable at a time: Duration (how long), Distance (how far away you are), and Distraction (what's happening around the dog). The cardinal rule is to train the three Ds one at a time — never raise two at once, and lower the others whenever you make one harder. Aim for roughly 80% success before you level up; if your dog is failing often, you've made it too hard.
During adolescence, expect your previously solid stay to wobble. That's the cue to drop criteria and rebuild — not to add pressure. A clear release word ('Free' or 'Okay') is what makes a stay mean something: the dog learns that holding position pays, and only the release ends it.
Building (or rebuilding) a rock-solid stay›
Step by step
- Start in position right in front of your dog. Reward staying after 1 second, then 2-3, building DURATION first toward roughly a minute.
- Add a clear release word ('Free' / 'Okay'). Reward staying — not the release itself.
- Add DISTANCE next: one step back, return, reward. When you first add distance, drop duration back to a few seconds, then rebuild.
- Add DISTRACTION last, in tiny increments: shifting your weight, dropping a treat, a knock at the door, someone walking by. Lower the other two Ds whenever you introduce a new distraction.
- Combine the Ds only after each is solid alone. When one gets harder, make the others easier. Mix in easy reps to keep success high and frustration low.
- Return TO your dog to reward most of the time, so 'stay' stays separate from 'come.' Aim for ~80% success before raising difficulty.
Impulse Control — "It's Your Choice"
"It's Your Choice" (IYC) teaches genuine self-control: the dog's own decision to disengage from a reward is what earns the reward. Over time this builds a generalizable "offer calm" default — the dog learns that backing off, not lunging, opens the door. The power of this exercise is that you say almost nothing. You don't command restraint; you let the dog discover it. Naming it ('leave it') turns self-control into imposed control, which is a different (and weaker) thing.
Be a vending machine, not a referee: when the dog grabs, access simply closes; when the dog backs off, the reward appears. Match the treat value to your dog's arousal — for an over-excited adolescent, use lower-value food so the dog can actually win, and keep your delivery calm.
Teaching It's Your Choice in five stages›
Step by step
- Stage 1 (closed fist): Hold treats in a closed fist at the dog's nose height. Say nothing. Let the dog sniff, lick, or paw. The instant it pulls its nose back even slightly, mark and OPEN your hand to feed one treat. If it dives, simply re-close.
- Stage 2 (open hand): Present treats on a flat open palm; close it if the dog moves in, open when it backs off. Build to the dog ignoring an open palm — then deliver the reward from your OTHER hand.
- Stage 3 (food on floor): Drop a treat and cover it with your foot if the dog dives; uncover when it backs off. Mark the choice to leave it and reward from your hand.
- Stage 4 (release): Add a release cue ('get it') so the dog clearly learns the difference between 'wait' (the default) and 'released.'
- Stage 5 (generalize): Walk past dropped food, place food on a chair, and so on. Choice to disengage = reward appears; a grab attempt = access closes.
- Throughout, stay completely silent during the choice phase, keep your hand at nose height (not high overhead), and end each short 1-3 minute session on a success.
Cooperative-Care Muzzle Conditioning
A comfortable, well-fitted basket muzzle is a piece of management and veterinary safety gear — like a seatbelt, not a punishment. A muzzle-conditioned dog gets calmer vet exams and grooming, stays safer in any situation where a startled or hurting dog might bite, and is more welcome in more places. The key is to condition the muzzle before you ever need it, so it predicts good things rather than emergencies. Choose a true basket style that lets the dog fully pant, drink, and take treats — never a close-fitting fabric muzzle that holds the mouth shut.
Conditioning a happy muzzle (go slow; the dog opts in)›
Step by step
- Choose a roomy basket muzzle that does NOT compress the airway and lets the dog pant, drink, and eat treats through it.
- Stage 1: Present the muzzle and mark/reward any look or sniff toward it. Don't put it on yet.
- Stage 2: Smear something tasty inside the basket. Let the dog put its nose in to lick, then withdraw on its own. Reward voluntary nose-in.
- Stage 3: Build duration of nose-in by feeding continuously through the front of the basket.
- Stage 4: Briefly fasten the strap, feed continuously, and unfasten BEFORE any sign of worry. Build duration slowly across sessions.
- Stage 5: Add brief movement and short walks while the dog wears it, always paying generously. Feed through the front so the muzzle becomes a treat-delivery device.
- Use a chin-rest or other start-button throughout: the dog opts in, and if it pulls away you stop immediately. Keep it 100% voluntary.
Cooperative Care: The Consent-Based Handling Foundation
Cooperative care means your dog is an active, willing participant in its own grooming and veterinary handling rather than something to be held down. The engine of the whole approach is a start-button behavior — most simply, a chin rest in your palm — that means "I'm ready, you may continue." When the dog lifts its chin or steps away, that is a "stop," and you stop immediately. Giving the dog this control dramatically reduces struggling and builds trust, because the dog learns it can always end the procedure.
This is the work that makes a lifetime of nail trims, ear checks, eye care, brushing, and exams low-stress. Break every task into the smallest possible steps, pair each step with food, and back up a step at the first stress signal. Never finish a grooming task over a struggling dog — that teaches the dog that struggling is futile, which is exactly how handling fear is born.
Building consent-based handling›
Step by step
- Teach the start-button: reward the dog for resting its chin in your open palm. Build a few seconds of duration. This is the dog saying 'go ahead.'
- Pair brief, pleasant touch with treats: touch a body part briefly, mark, treat. Build up across short sessions through ears, muzzle and lips, paws and individual toes, tail and rear, and belly.
- Introduce tools positively and at a distance first: show a nail clipper or grinder, let the dog hear it run from across the room, then touch it (no cut) to a nail — mark and treat each tiny step.
- Honor the consent signal every single time: if the dog lifts its chin, turns away, or disengages, STOP at once. The dog learns it has a working 'pause button,' which makes it more willing next time.
- For nails, work one nail tip at a time with high-value jackpots; for any wipe or clean, progress from near the area, to a dry pass, to the real thing over many short sessions.
- Always end while the dog is still relaxed, never over a struggle.
Car and Travel Basics: Safe, Calm Rides
Comfortable car travel is built the same way as everything else: in tiny, positive steps, long before you need a stressful trip. The two pillars are safe restraint and a positive association. An unrestrained dog is an injury and driver-distraction risk; a dog that only ever rides to the vet learns to dread the car. So restrain properly, and make sure the car predicts good things — not just the clinic.
Desensitizing your dog to the car›
Step by step
- Start outside the parked car: reward calmly near it until the dog is relaxed in its presence.
- Move to the stationary car: feed and reward the dog in its secured restraint with the engine off.
- Turn the engine on (still parked): keep paying, keep it calm, then turn it off — no drive yet.
- Take a very short drive (around the block) and build duration only as the dog stays relaxed across many short trips.
- Pair the car with calm enrichment where safe (a long-lasting chew or lick mat in a secured setup), so riding predicts good things.
- Build a positive vet-visit routine — drive to fun places too — so the car doesn't only ever lead to something stressful.
0/6
Adult & Advanced (12+ months)
This is the phase where the breed's origin story pays off or bites back. The Giant Schnauzer was built for working drive plus high energy plus independent problem-solving — and the reliable way to satisfy that vector is to give the dog a job, force-free and reward-based. The counterintuitive but essential point: mental work reduces guarding, reactivity, and self-employment far more than raw physical exhaustion does. A dog that runs ten miles is a fitter dog with the same restless brain. A dog that gets to think and solve is a settled one.
Strong outlets for this breed, all reward-based, building on (not replacing) the universal shaping and marker mechanics in the shared library:
- Scent work / nosework and tracking — taps the independent problem-solving directly and tires the brain fast; excellent for a guardian breed because it's calm, focused, and confidence-building.
- Trick training and precision obedience — endless novelty for a fast learner; channels the biddable side.
- Structured tug with clear rules — explicit “take it” and “drop” start/stop cues turn a high-arousal game into an impulse-control exercise.
- Cooperative tasks and chores — carry, fetch named items, tidy toys; a job-oriented breed loves being useful.
- Rally, agility foundations, and control games — teamwork with a handler, exactly what the breed was made for.
Generalization & proofing: making behavior reliable everywhere
A behavior your dog performs perfectly in the kitchen is, to the dog, a kitchen behavior. Dogs do not generalize automatically — a cue learned in one place, with one set of sights, sounds, and smells, does not transfer to the park, the sidewalk, or a friend's living room until you deliberately re-teach it there. Adult and advanced work is mostly this: taking solid behaviors and proofing them against the real world so they hold up under genuine distraction (per the site's training corpus).
The framework is the 3 Ds — Duration, Distance, and Distraction. Raise only one at a time, and lower the other two when you make one harder. If you add distraction, shorten the duration and shrink the distance you ask the dog to work at. Push two Ds at once and you set the dog up to fail.
Generalize a known behavior to a new place›
Step by step
- Start in the new location at the EASIEST version of the behavior — treat the new place itself as a fresh, hard distraction and lower your other criteria accordingly.
- Begin where your dog can still notice the environment but stay loose, relaxed, and willing to eat. If it won't take food, you are too close to the distraction or too deep in the new context — create space.
- Reward generously and at a high rate for early reps in the new place; you are paying to rebuild the behavior here, not testing what the dog already 'knows.'
- Raise ONE of the 3 Ds at a time. Add a little duration, OR a little distance, OR a little distraction — never two together.
- Vary your OWN position and orientation too: sit, stand, turn sideways, turn your back. Dogs don't generalize these on their own either.
- Once roughly 80% reliable, move to the next, slightly harder location. A few genuinely different settings teach the dog the behavior means the same thing everywhere.
- Use real-life rewards where you can — a release to go sniff, permission to greet, the walk continuing — so the behavior pays in the environment's own currency.
Trained behaviors decay without reinforcement. Generalization is not a one-time project you finish; build a short, periodic tune-up of your core cues (recall, settle, loose-leash, leave-it) into ordinary life so reliability is maintained rather than rebuilt from scratch (per the site's training corpus).
Scentwork & nosework: low-impact enrichment that tires the brain
Sniffing is one of the most natural, self-rewarding, and mentally tiring things a dog can do — and it is gentle on the body, making it ideal enrichment for almost any dog. A short search session can settle and satisfy a dog far more than a longer physical outing, because the work is done by the nose and the brain. It is also a wonderful confidence-builder: in a search, the dog cannot really be 'wrong,' and it controls its own win (per the site's training corpus).
The model below is the foundation of recreational nosework (in the K9 Nose Work / NACSW tradition). You can keep it as pure backyard-and-living-room enrichment, or, if you enjoy it, build toward target-odor work and titles. Either way the point is the same: let the dog problem-solve independently.
Start a 'find it' search from scratch›
Step by step
- Priming: with your dog watching, drop a few favorite treats (or a favorite toy) into one open box. Release the dog to find them and self-reward. Keep it easy and let the dog WIN.
- Build a little drive: gently hold the dog back for a second so it strains slightly toward the baited box, then release. A touch of harmless frustration builds search enthusiasm.
- Add boxes: spread out several boxes with only one or two baited. Always reward AT the source — place or drop the reward exactly where the find is, so the payoff happens at the right spot.
- Expand the search area: progress from a line of boxes to a whole room, then to outdoor areas and objects, varying the height and difficulty of the hides only gradually.
- Reward heavily and repeatedly at the precise source, so the dog learns to drive all the way to the source rather than freelancing nearby.
- Use a consistent search cue and a clear start-and-finish ritual so the dog knows when it is working and when it is done.
- Optional next level: pair a target odor (such as birch) with the reward and back-chain it, building toward an Odor Recognition Test before any trialing.
0/5
Foundations of reactivity work: distance, counter-conditioning, and getting a pro
Reactivity — barking, lunging, or fixating at a trigger (often another dog or a person) on leash — is usually rooted in fear or over-arousal, not 'bad behavior.' You cannot punish it away; correcting the reaction only adds fear to a situation that is already too much, and it can make things worse. The goal of force-free reactivity work is to change the underlying emotion: to teach the dog that the trigger reliably predicts good things and calm reorientation to you (per the site's training corpus).
Everything in this method depends on one idea: threshold. The threshold is the point past which your dog can no longer cope and stops being able to learn. Below threshold the dog can notice a trigger and still stay loose and eat; above it, the dog fixates, lunges, or refuses food. Refusing food a dog normally takes is the single best 'over threshold' alarm — it means the dog is no longer in a learning state, and you must create distance (per the site's body-language corpus).
The distance + counter-conditioning method (with engage-disengage)›
Step by step
- Rule out pain first; use a Y-front harness only for any leash force — never neck pressure or aversive tools, which add fear and can worsen reactivity.
- Manage to prevent rehearsal: plan low-traffic routes, scan ahead, cross the street, change direction, and use visual barriers (parked cars, hedges) to break line of sight. Every reaction the dog rehearses makes the pattern stronger.
- Find your dog's threshold distance — the distance at which it can SEE the trigger but still eat and stay loose.
- Open-bar / closed-bar counter-conditioning: the instant your dog notices the trigger, feed high-value treats continuously. The moment the trigger is gone, the food stops. Trigger appears = food rains; trigger leaves = food ends. Over many reps, the trigger comes to predict good things.
- Engage-disengage ('Look At That'): mark the calm look AT the trigger, then feed as the dog turns back to you. Build a look-then-check-in pattern so glancing at a trigger becomes a cue to reorient to you.
- Only decrease distance or increase intensity when the dog is loose, eating, and offering check-ins. If it fixates, lunges, or won't eat, you are over threshold — calmly add distance and reset.
- Never tighten or jerk the leash, and never correct the bark or growl. You are changing the emotion underneath, not suppressing the symptom.
- Keep sessions short and end on a success, before the dog floods or tires.
Know when to bring in a professional — early. Get qualified help if you cannot keep your dog reliably under threshold, if reactivity is escalating, or if there has been any bite that breaks skin. Use an escalation ladder: a credentialed force-free trainer (such as CPDT-KA / KPA-CTP) for general training and mild cases; an IAABC consultant or equivalent for more complex behavior; and a board-certified veterinary behaviorist (DACVB) for aggression, severe cases, or anything involving a bite. Getting help early is a sign of skilled, caring ownership — not failure (per the site's training corpus).
Resource-guarding prevention: trade up, never confront
Resource guarding — stiffening, freezing, hovering, growling, or snapping over food, chews, toys, stolen items, resting spots, or even people — is normal, fear-and-loss-driven behavior. A dog guards because it has learned that a human (or another dog) approaching its valued thing means the thing is about to disappear. The entire prevention strategy is to flip that belief: a person coming near your dog's good stuff should reliably mean even better stuff arrives — never that something is taken away (per the site's training corpus).
This section is about prevention: building good habits in a dog that does not yet guard, or guards only mildly. It is positive only, and it is done proactively — never started during or right after a guarding incident.
Build anti-guarding habits (trade-up, prevention)›
Step by step
- Manage first so guarding is never rehearsed: feed dogs separately, proactively pick up high-value items before conflict can start, and set no-go zones around eating and resting dogs.
- The pass-by drop: as you walk past your dog's food bowl during a meal, casually toss a higher-value treat toward the bowl and keep walking. Your approach now predicts a bonus, not a threat.
- Bowl approach, at a safe distance: while the dog eats a LOW-value meal, approach only to a distance where it stays relaxed, toss a better treat toward the bowl, and walk away. Decrease the distance only as the dog stays loose and happy to see you coming.
- Trade up for objects: offer a HIGHER-value treat in exchange for whatever the dog has. As it drops the item, mark and feed — then OFTEN give the item back, so giving it up is never a loss. Add a 'drop' or 'give' cue once the trade is automatic.
- Always trade UP or return the item — never snatch. Snatching teaches the dog to guard, gulp, or run.
- Raise difficulty gradually up the value hierarchy, and across different people and locations, only after lower-value items are reliably relaxed and non-confrontational.
- Child & multi-dog safety: actively supervise, teach children to NEVER approach a dog that is eating, chewing, or in its bed, and feed dogs apart from one another.
0/6
Settle under distraction: a portable off-switch
An adult dog needs a reliable off-switch — the ability to genuinely relax on a mat even when something interesting is happening. This is not an obedience 'stay'; you are reinforcing a calm emotional state (soft eyes, a hip-rolled lie-down, slow breathing), not a rigid position. Built well, a mat becomes a portable signal that means 'we are settling now,' which you can take to a cafe patio, a vet lobby, or a friend's house (this follows the relaxation-protocol approach in the site's training corpus).
Teach settle and proof it against distraction›
Step by step
- Set up a dedicated mat as the relaxation anchor and have tiny treats ready.
- Get the dog onto the mat (lure a down if needed) and reinforce STAYING there — reward the dog for remaining relaxed regardless of exact position, and jackpot a genuinely relaxed down.
- Reinforce the calm emotional state: soft eyes, a rolled hip, slow breathing. Use a calm voice and unhurried treat delivery rather than crisp, exciting marking.
- Add small distractions one at a time while the dog holds position: count to ten, take a step back, take two steps back, sit beside the dog, clap softly, walk to the door, touch the doorknob, briefly step out of sight and return.
- Deliberately alternate harder and easier reps so the dog keeps succeeding; if any step is too hard, split it into smaller pieces.
- Advance only when the dog stays relaxed at the current level. Expect a temporary dip partway through — stay patient and don't push.
- Once solid at home, repeat much EASIER versions in new, mildly distracting places, then gradually fade the mat so the dog can settle anywhere.
Maintenance & the escalation ladder: keeping it strong, knowing when to call for help
Reaching a well-trained adult dog is not a finish line. Trained behaviors decay without reinforcement, and issues that were dormant can resurface around social maturity (commonly noted around 12–18 months in the site's corpus). The job in this phase is maintenance: keep hard-won behaviors strong, catch decay early, and know exactly when a situation has moved beyond do-it-yourself training.
0/5
The escalation ladder
Match the helper to the problem (per the site's training corpus):
- A credentialed force-free trainer (such as CPDT-KA / KPA-CTP) — for general training, manners, and mild behavior issues.
- An experienced behavior consultant (such as IAABC, CTC, or a certified separation-anxiety trainer) — for more complex or persistent behavior.
- A board-certified veterinary behaviorist (DACVB) — for separation anxiety, aggression, or anything involving a bite that breaks skin. A DACVB can also assess whether medication would lower a dog's anxiety baseline enough that it can actually learn.
Body Language
The Giant Schnauzer's own morphology can hide the signals you most need to read. Heavy eyebrows, a full beard, and a mustache obscure the eyes and muzzle — exactly the features you'd normally watch for early stress (whale eye, tightened lips, a hard stare). And ear carriage reads differently depending on whether the ear is natural (folded) or was historically cropped (erect), so the same underlying mood can look different on two dogs.
The fix is to apply the universal escalation-ladder framework to this breed's body: rely on whole-body clusters, not the face alone. Read the more reliable channels — a weight shift forward or back, stillness or a sudden freeze, the tail base (height and stiffness at the root, not just the tip), and raised hackles. Learn this dog's individual baseline so you can spot the first quiet rungs of arousal before they climb.
How to read your dog: whole-body clusters in context
Your dog is communicating with you all the time, mostly through quiet body language rather than sound. Learning to read it is the single most useful skill in force-free training: it lets you keep your dog comfortable, prevent fear and aggression before they start, and build trust instead of conflict. The modern, evidence-based approach (endorsed by the American Veterinary Society of Animal Behavior, AVSAB) rejects old "dominance" and "alpha" framing entirely. Almost everything that looks like stubbornness, defiance, or a "power grab" is really fear, anxiety, conflict, over-arousal, confusion, or pain.
Three rules that sit above every signal
- Read clusters, not single cues. One lip-lick or one yawn means little on its own. Read the whole body at once — eyes, ears, mouth, posture, weight, tail, breathing — and ask what they say together.
- Read in context. The same wide eyes can mean joy at the door or alarm at the vet. What just happened, and what is happening around the dog, changes the meaning.
- Read against your dog's baseline. Every dog has its own neutral set of ears, eyes, and posture. Learn what your relaxed dog looks like first, then watch for the direction of change.
The traffic-light quick reference: green, yellow, red
A fast way to make decisions in the moment is to sort what you see into three lights. Each is a whole-body read, not a single cue, and each comes with a clear action.
Green — relaxed, safe to engage
- Soft eyes, smooth brow, normal or slow blink
- Loose, relaxed open mouth (a true easy pant, not labored)
- Ears in their neutral position; loose, curved, wiggly body
- Loose wagging that moves the whole rear and hips
Action: Enjoy it and reinforce the calm. This is your baseline — learn it well so you can spot any change.
Yellow — early stress, lower the pressure
- Quick lip-lick or tongue flick, or a yawn when not tired
- Head turn, body turn, looking away, walking away
- Sudden out-of-context sniffing, a raised front paw
- Ears pulled back or splayed; a full-body shake-off; displacement scratching or sneezing
Action: Pause, soften, lean back, add distance, and remove or reduce whatever is bothering the dog. Never punish. Let the dog self-soothe or leave.
Yellow turning red — over threshold, stop and make space
- Stiffening or freezing; weight shifted forward; a hard, fixed stare
- A tight or suddenly closed mouth; crouching or leaning away
- Raised hackles along the shoulders or spine
- Refusing food it normally loves — the single clearest sign the dog is too stressed to learn
Action: Stop immediately, create distance, remove the trigger, and give the dog an exit. If it cannot disengage, leave entirely and let it fully recover before any future, gentler exposure.
Red — overt warning, back off now
- Growl, snarl or lip-lift, snap, or air-snap
- A freeze that will not release
- Stiff, hovering, or curling over a valued item (resource guarding)
Action: Stop instantly, back away, and end the interaction safely. Do not reach in, take anything, or punish. Note exactly what preceded it, rule out pain with your vet first, then consult a board-certified veterinary behaviorist (DACVB) or a credentialed force-free professional.
Signal categories: calming, appeasement, displacement, and distance-increasing
Dog signals fall into a few functional families. Knowing the job a signal is doing — rather than memorizing a list — helps you respond correctly to ones you have never seen before. (The calming-signal framework here draws on Turid Rugaas's work and the broader applied-behavior literature.)
Calming and appeasement signals — "please lower the pressure"
These are polite, low-cost requests to de-escalate and reassure. They are not guilt, stubbornness, or misbehavior. Common examples:
- Lip-lick / tongue flick with no food present — one of the earliest stress cues.
- Yawning when the dog is not tired — a tension-defusing self-calming signal.
- Head turn or gaze aversion — "I'm not a threat, please slow down."
- Turning the body away, or walking away — a stronger, healthy choice to disengage; never "ignoring you."
- Soft squint, blinking, paw lift — uncertainty and a wish to keep things calm.
What to do: treat any of these as a "dial it down" cue. You can even mirror them — turn your own head away, soften, lean back — to tell the dog you mean no harm.
Displacement behaviors — "I'm in conflict and unsure what to do"
These are normal behaviors performed at an odd moment to relieve internal tension. The act itself is ordinary; the timing is the tell. Examples appearing abruptly in a tense moment:
- Sudden out-of-context ground sniffing
- A burst of scratching, or a sneeze, when nothing prompted it
- Brief out-of-place grooming or licking
- A full-body shake-off when the coat is dry — often a "reset" that marks the dog winding down from a stressor
What to do: judge by context, not the act. Let the dog self-regulate — sniffing and shake-offs are healthy. If a behavior like scratching is frequent even in calm settings, rule out a medical cause first.
Distance-increasing signals — "give me space"
When polite requests do not work, dogs escalate to clearer space-making signals: stiffening, freezing, a hard stare, then growl, snarl, snap, and finally bite. These are communication, not aggression for its own sake — every rung means earlier, quieter signals went unheard or were suppressed.
The escalation (stress) ladder: subtle to overt
Distance-increasing communication follows a fairly predictable ladder from the subtlest request to an outright bite. Dogs climb it when each lower rung is ignored. Your goal is to respond at the bottom so the dog never needs the higher rungs — and to recognize that a bite is almost always the result of earlier signals being missed or punished, never an out-of-the-blue event.
Subtle appeasement — blink, nose/lip-lick, yawn. The lowest rung: "I'm a little uneasy, please lower the pressure."
Turn the head away / avert the eyes.
Turn the body away, sit, or lift a paw.
Walk away — actively removing itself from the situation.
Creep low with ears back or flattened.
Crouch, body lowered, weight back, tail base tucked.
Lie down, leg up / belly exposed under social pressure — a high appeasement plea, NOT an invitation to touch (distinct from a relaxed, wiggly belly-up for a rub).
Stiffen, freeze, hard stare — the critical pivot point. Appeasement has failed and a snap may be next. Treat any freeze as "stop now."
Growl — a clear, honest distance-increasing request. Never punish it.
Snarl / lip-lift, muzzle-punch, tooth-snap — escalated warnings, one rung below biting.
Snap / air-snap — an inhibited warning bite: "I could have bitten and chose not to."
Bite — the last resort, when all earlier communication failed or was punished.
What to do the moment you see the ladder rising›
Step by step
- Stop what you are doing immediately — do not advance, reach over, lean in, or try to take anything.
- Calmly create distance and remove or reduce the trigger; do not loom or stare.
- Give the dog a clear exit and let it move away if it wants to.
- If the dog cannot disengage, leave the situation entirely and let it fully decompress.
- Note what happened just before (the antecedents) so you learn this dog's triggers.
- Never punish — these signals ARE the warning system you want to keep intact.
- Re-approach later only at a much lower intensity, far enough away that the dog stays loose and can still take food.
Play versus over-arousal: telling good fun from tipping over
Healthy play and trouble share the same raw motor patterns — chasing, mouthing, body-slamming, growling, even raised hackles — which is why play is so easy to misjudge. The difference is in the quality of the movement and whether both dogs keep choosing to continue. (The role of the play bow as honest "this is play" communication comes from Marc Bekoff's work.)
Signs of genuine, healthy play
- Play bows (front down, rump up, bouncy) that punctuate the action
- Loose, wiggly, exaggerated, "inefficient" movement; curving rather than straight-line approaches
- Self-handicapping and role reversal — the stronger dog holds back; dogs trade who chases and who is chased
- Natural micro-pauses every few seconds — a shake-off, a sniff, a brief break
- Both dogs voluntarily re-engaging after a pause
Signs of over-arousal (time to step in)
- Relentless intensity with no pauses; one dog is always the target
- Stiff body, fixed staring, frantic pacing
- Mounting/humping, frustration whining
- Role reversal has stopped
The consent test (3-second check)›
Step by step
- When play looks intense or one-sided, calmly interrupt and gently hold or call both dogs apart for a moment.
- Release the dog that was being chased or pinned.
- Watch what it does: if it bounces straight back in to re-engage, the play is mutual — let it resume.
- If it moves away, sniffs, shakes off, hides, or stays behind you, it was not enjoying it — end the bout and give it space.
- Build short, mandatory rest breaks into play BEFORE you see distress, not after.
Pain and illness signs that warrant a vet (medical-rule-out first)
Behavior is one of the first places pain and illness show up — long before a limp or an obvious symptom. Because a large share of dogs referred for behavior problems are found to be in pain (Mills et al.: roughly one-third up to about 80%), the rule in force-free training is firm: any new or escalating behavior change gets a veterinary exam before you treat it as a training problem. Pain-related growling or snapping is a dog defensively guarding a body part that hurts — not "acting out," and never something to punish.
Behavior changes that warrant a vet check
- New irritability, growling, or snapping — especially when touched, lifted, or approached while resting. This often pinpoints where it hurts.
- Reluctance to move, jump, or do stairs; slow to rise; a hunched or arched back; low head carriage. These read as "lazy" or "aging" but are classic pain signs.
- Hiding, withdrawal, less greeting or play, or new clinginess — any clear change from the dog's normal sociability.
- Restlessness, pacing, inability to settle, trembling unrelated to cold, or panting at rest (not after exercise) — out-of-context discomfort.
- Appetite change, dropping food, chewing on one side, pawing at the face/mouth, bad breath — often oral or dental pain.
- Head shaking, ear scratching, head tilt, or a new head-shyness — possible ear or skin infection.
- Squinting, holding an eye shut, pawing or rubbing an eye, tearing, or cloudiness — eye pain, which can threaten sight. A new, persistent, or one-sided squint is pain, never a calming signal.
0/6
Medical-rule-out-first›
The principle that any sudden or worsening behavior change is treated as a possible health problem and checked by a veterinarian before it is addressed as a training or behavior issue. It protects the dog from being "trained through" a painful or medical condition, and it protects you from chasing a behavioral fix for a physical cause.
Health & Husbandry
The Giant Schnauzer is a large, deep-chested dog, and that conformation carries an elevated risk of gastric dilatation-volvulus (GDV, or “bloat”) — a condition where the stomach distends with gas and can twist on itself. GDV is a true, rapidly fatal emergency; every owner of a deep-chested breed should know the warning signs cold. This is educational information, not veterinary advice — your vet is the authority on your individual dog.
Sensible daily management reduces distension and gulping (drawn from the corpus feeding guidance for at-risk dogs):
0/5
Prophylactic gastropexy — a surgical procedure that tacks the stomach to prevent it twisting, often done at the same time as spay/neuter — is sometimes discussed for deep-chested breeds. Whether it is appropriate for your dog is a veterinary decision to raise with your vet, not a training matter. Bring it up at a wellness visit so you can weigh it calmly rather than in a crisis.
The Giant Schnauzer wears a harsh, double-textured wire coat — a dense soft undercoat beneath a wiry, weather-resistant topcoat — plus the breed's signature furnishings: bushy eyebrows, a full beard and mustache, and longer leg hair. That coat is high-maintenance, and how you maintain it is a real choice:
- Hand-stripping plucks out the dead topcoat by the root. It is more labor-intensive but preserves the correct harsh texture and rich color of the wire coat, and is the traditional method for the breed.
- Clipping cuts the coat with clippers. It is faster, softer, and easier to maintain, but over time it softens the texture and lightens the color. For a pet with no show ambitions, this is a perfectly reasonable, comfortable choice.
Whichever you choose, regular brushing is non-negotiable — the leg furnishings and beard mat quickly. And the beard needs ongoing hygiene: it traps food and water, staying damp and picking up odor and debris, so wipe and dry it after meals and drinks. This is educational grooming guidance, not a re-teach of general handling.
Responsible breeding for the Giant Schnauzer follows a parent-club / OFA-CHIC screening panel. Ask any breeder to show you results, and use this list to guide questions with your own vet. The recommended screening for the breed typically includes:
- Hip evaluation (OFA or PennHIP)
- Eye examination (an ophthalmologist / CAER eye exam)
- Cardiac evaluation
- Thyroid evaluation (autoimmune thyroiditis panel)
Breed-associated conditions worth discussing with your veterinarian include hip dysplasia and seizures / idiopathic epilepsy, among others. I am deliberately not quoting prevalence percentages: any real numbers must be verified against AKC, the Giant Schnauzer Club of America, and OFA-CHIC before they are published. This is educational, not diagnostic.
Feeding & Body Condition: The Husbandry Baseline
Good training rests on a healthy, comfortable dog, and that starts with what goes in the bowl. The two questions that matter most for any dog are: is the food nutritionally complete? and is your dog at a lean, healthy weight? Everything else in feeding is detail. This is educational guidance, not veterinary advice — your veterinarian (and, for complex cases, a board-certified veterinary nutritionist) is your partner for any specific diet decision.
Choose a complete-and-balanced diet
Look on the package for the AAFCO Nutritional Adequacy Statement — this is the part that tells you the food is actually balanced, not the marketing on the front (per AAFCO label guidance). You want it to say "complete and balanced" for your dog's life stage (growth/puppy, adult maintenance, or all life stages). A statement that the food is "for intermittent or supplementary feeding only" means it is not a safe sole diet.
Wording matters: a food substantiated by "animal feeding tests using AAFCO procedures" (a feeding trial) is generally a step above one merely "formulated to meet" the AAFCO nutrient profiles (lab/computer formulation). The WSAVA Global Nutrition Committee suggests owners ask the maker who formulates the food (ideally a qualified nutritionist), whether it is feeding-trial tested, and whether they will share a full nutrient analysis and the calorie content — apply that same scrutiny to fresh, "human-grade," and direct-to-consumer brands too.
Feed to body condition, not to the bag
Package feeding charts are starting estimates and overfeed many dogs. The real gauge is your dog's Body Condition Score (BCS) on the 9-point scale, where the target is 4–5/9 (per WSAVA nutritional assessment guidance): you can easily feel the ribs under a thin layer of fat, you see a waist when looking down from above, and you see a tuck-up of the belly from the side. Reassess every 2–4 weeks and adjust the amount you feed by roughly 5–10% per change.
Keeping a dog lean is one of the highest-impact things you can do for its lifespan and comfort: in the Purina Lifespan Study, leaner dogs lived a median of roughly two years longer with less severe arthritis. Measure meals with a gram scale or proper measuring cup (never a random mug), and keep treats and chews to 10% or less of daily calories — the "10% rule" — subtracted from the meal ration. This matters for training: those reward treats count.
Run a 30-second body condition check›
Step by step
- Ribs: run flat hands along the ribcage. You should feel the ribs easily with only light fat cover (like the back of your hand) — not see them sticking out, and not have to press through padding.
- Waist from above: look straight down. There should be a visible narrowing behind the ribs. A straight or bulging outline means overweight.
- Tuck from the side: the belly should rise up toward the hindquarters rather than hanging level with the chest.
- Score 1–9 (target 4–5). If you can't find a waist or feel ribs, ease back ~10% on food and recheck in 2–4 weeks.
- Re-check every few weeks and after any diet change — trends matter more than any single day.
Feeding cadence and diet changes
Young puppies need more frequent, smaller meals; the general pattern is roughly 3–4 meals/day from ~8 weeks to 4 months, 3/day from 4–6 months, tapering toward 2 meals/day by 6–12 months, with adults and most seniors on 2 meals/day. Use a growth/puppy or all-life-stages diet through puppyhood, then transition to adult maintenance near skeletal maturity. Switch foods gradually over 7–10 days (about 25% new food every 2–3 days) to avoid stomach upset.
Vaccines & Parasite Prevention: The Core Framework
Vaccines and parasite control are squarely a veterinary decision — your vet tailors them to your dog's age, lifestyle, region, and local law. What follows is the general framework so you understand why the schedule looks the way it does. It is educational, not a prescription, and it does not replace your veterinarian's plan.
Why the puppy series is a series
Nursing puppies absorb their mother's antibodies through colostrum. These maternal antibodies fade over weeks at an individually variable rate, so there's no single age that's guaranteed to be the right one for a first shot. During the "window of susceptibility," maternal antibodies can be high enough to block a vaccine from working but too low to fully protect against the real virus. The answer (per AAHA 2022 vaccination guidance) is to give the core puppy series every 2–4 weeks until at least 16 weeks of age, so that whenever maternal antibodies finally drop, a dose is right behind it. A puppy that "finished its shots" at 12–14 weeks is not fully covered — that final dose at or after 16 weeks is the critical one.
The core framework (confirm specifics with your vet)
Core vaccines are recommended for essentially all dogs. The core viral set is distemper (CDV), adenovirus-2 (CAV-2), and parvovirus (CPV-2) — commonly written DAP. (Parainfluenza is often bundled into combo products labeled DHPP/DAPP, but it is technically non-core.) Rabies is core and legally required, with timing and booster intervals set by local law. Per the AAHA 2024 update, leptospirosis is now considered core for dogs that go outdoors. Non-core / risk-based vaccines — Bordetella (kennel cough), canine influenza, Lyme, and others — are recommended based on lifestyle: boarding, daycare, grooming, travel, or regional disease risk. Your vet decides which apply.
0/5
Parasite prevention is year-round
Modern guidance (per the Companion Animal Parasite Council, CAPC) favors year-round, broad-spectrum prevention for life rather than seasonal stop-start dosing. The pillars are heartworm (monthly or long-acting injectable), intestinal worms (many of which are zoonotic — they can infect people), and fleas and ticks. Several heartworm products also cover common intestinal worms, but note an important gap: routine monthly combos do not cover Giardia or coccidia — that's what fecal exams catch. Plan on at least 4 fecal exams in the first year, then twice yearly for adults.
Dental Care: Daily Brushing the Force-Free Way
Dental disease is one of the most common — and most preventable — health problems in dogs, and untreated periodontal disease can seed bacteria that affect the heart, liver, and kidneys. The single best thing you can do at home is brush your dog's teeth, and the force-free way to get there is the same cooperative-care approach you use for everything else: build a positive association slowly, never wrestle. This is educational guidance; your veterinarian assesses and treats actual dental disease.
The home gold standard: daily brushing
Brush daily with a dog-specific enzymatic toothpaste — daily is ideal, and 3–4 times a week is the realistic minimum for benefit (per AAHA dental guidance). Use a soft pet toothbrush, dual-head brush, or finger brush; for many dogs a child-size soft brush or finger brush fits best. Focus on the outer (cheek-facing) surfaces, where tartar builds up most, angling the bristles toward the gumline at about 45 degrees — the tongue helps keep the inner surfaces cleaner. Keep every session short and pleasant.
Build toothbrushing with LIMA desensitization (over 1–3+ weeks, never forced)›
Step by step
- Days 1–3: Let your dog LICK a dab of flavored enzymatic paste off your finger. That's the whole session — pure positive association. Reinforce calmly and stop while it's still a happy game.
- Days 4–6: Briefly lift a lip and touch a few teeth and gums with a pasted finger, then reward and release. Keep it to a couple of seconds.
- Days 7–9: Introduce the finger brush or toothbrush on just a few teeth for a second or two, then reward.
- Then gradually extend coverage and duration — a few more teeth each session — always ending BEFORE your dog gets uncomfortable.
- Use a consistent cue and a predictable position so the routine becomes familiar. If your dog pulls away or tenses, you've moved too fast: drop back a step.
Chews, diets, and additives — choose by the VOHC seal
Dental chews, dental diets, and water additives are adjuncts, not replacements for brushing or professional care — they reduce plaque above the gumline but don't clean below it. Look for the VOHC (Veterinary Oral Health Council) Seal of Acceptance, the only independent registry of products shown to reduce plaque and/or tartar (verify the current list at vohc.org). Size chews appropriately, supervise, and count the calories toward the daily 10% treat budget.
Watch for trouble — and get professional cleanings
Early warning signs include persistent bad breath (often the first thing owners notice), visible tartar, red or bleeding gums, drooling, dropping food or chewing on one side, and pawing at the face. Facial or jaw swelling — especially below an eye — can signal a tooth-root abscess and is urgent. Because dogs hide oral pain, a subtle behavior change (irritability, withdrawal, head-shyness) may be the only sign — another reason the medical-rule-out-first reflex matters before treating new grumpiness as a training problem.
Home care doesn't replace professional care. Dogs need a periodic professional cleaning (COHAT) under general anesthesia with full-mouth dental X-rays, because most dental disease lives below the gumline where you can't see it. AAHA recommends professional assessment beginning around age 1 for small breeds, on a cadence your vet sets. So-called "anesthesia-free dental cleaning" only scrapes visible crown tartar, can't clean or probe below the gumline, provides no X-rays, and is not endorsed by AAHA.
Senior Dogs: Comfort, Screening & the Pain-First Reflex
As dogs age, the kindest and most effective thing you can do is catch problems early and keep your dog comfortable — because so much of what looks like "just getting old" or "acting different" is actually treatable pain or disease. This section is educational; your veterinarian guides senior screening, pain management, and quality-of-life decisions.
Screen earlier and more often
Dogs are generally considered senior around 7–8 years (per AAHA), though larger dogs age sooner and small dogs later. The most useful shift in senior care is frequency: AAHA's 2023 senior guidance recommends physical exams every 6 months, because a six-month gap represents a large fraction of a senior's remaining life and catches change earlier. Your vet will typically build a baseline lab database (CBC, full chemistry, and a complete urinalysis — the urinalysis is essential and often skipped) at least annually, and may add screening for kidney, thyroid, and heart markers plus a blood-pressure check. Weigh your dog and re-score body condition at every visit to catch both creeping weight gain and muscle loss.
Manage arthritis and mobility — weight first
Osteoarthritis is extremely common in older dogs, and the single highest-impact intervention is keeping your dog lean (BCS 4–5/9) — excess weight worsens joint pain directly. Layer on environmental help and let your vet lead the medical side:
- Home setup: non-slip flooring and runners (slick floors are an injury risk), ramps for the couch/bed/car, raised food and water if helpful, orthopedic bedding, and a no-jumping rule.
- Exercise: tailored, low-impact, regular activity — avoid high-impact bursts. Keep sessions cool and low-arousal.
- Medical pain control: your vet may prescribe NSAIDs or other modern analgesics with appropriate monitoring bloodwork — never combine NSAIDs with steroids, and never give human pain relievers without veterinary direction.
- Adjuncts: marine-source omega-3 (EPA+DHA) has the best evidence among supplements; physical rehabilitation (hydrotherapy, certified rehab) can help — always supervised.
Cognitive change (and the pain mimic, again)
Canine Cognitive Dysfunction is screened with the DISHAA framework — Disorientation, altered social Interactions, Sleep-wake disruption (night waking/pacing), House-soiling, Activity change (aimless wandering, less purposeful activity), and Anxiety. But the first step is always to rule out medical mimics — especially under-treated pain, which is one of the most common reversible causes of night restlessness and house-soiling — plus sensory loss, infection, and endocrine or blood-pressure problems. Supportive measures include predictable routines, gentle enrichment, easy navigation, night-lights, and good sleep hygiene; your vet can discuss diet and medication options.
Quality of life and end-of-life planning
For palliative and hospice decisions, many families track a simple quality-of-life scale (HHHHHMM): Hurt (is pain and breathing well controlled?), Hunger, Hydration, Hygiene, Happiness, Mobility, and More good days than bad. Each category is scored 1–10. Scoring serially — for example a brief weekly journal — turns an emotional decision into an observable trend and reduces guilt and second-guessing. Your veterinarian is an essential partner here: they can interpret test results you can't observe and help you weigh comfort against suffering. The guiding principle is comfort and dignity — supporting your dog when discomfort begins to outweigh its capacity to enjoy life.
Body Condition Score (BCS)›
A standardized 1–9 scale for assessing whether a dog is underweight, ideal, or overweight, using how easily you can feel the ribs and see a waist and belly tuck. The healthy target is 4–5/9. It governs how much you feed far better than any package chart (per WSAVA).
COHAT›
Comprehensive Oral Health Assessment and Treatment — a professional dental cleaning done under general anesthesia that includes full-mouth dental X-rays, cleaning above and below the gumline, probing, and treatment of diseased teeth. It's the only way to address disease below the gumline, where most dental problems hide.
Troubleshooting
These are the problems a Giant Schnauzer actually presents — predictable from the breed's guarding history, and all manageable force-free. The universal principle underneath every one of them: manage the environment so the dog can't rehearse the unwanted behavior, keep the dog under threshold, and reward an alternate behavior you'd rather have. You cannot punish a guardian breed out of guarding; you can teach it that your presence and its calm choices pay better.
Fence / window / leash barrier reactivity
Barriers frustrate a dog that wants to investigate or patrol, and each episode rehearses it. Manage first: block visual access (window film, a solid fence panel, or moving the dog away from the front window), and use distance on leash. Then counter-condition: at a distance where the dog notices the trigger but stays calm, mark and feed for looking-then-disengaging, gradually closing distance over many sessions.
Over-alarm barking at visitors
Alerting is the job the breed hired itself for. Rather than suppress it, redirect it: teach a “thank you, go to your mat/place” routine that ends the barking with a rewarded job, and reward calm greetings. Never yell — to the dog, that's just you barking along.
Guarding of space, food, or resources
Rehearse trades, not confrontations: teach that a human approaching a resource predicts something better arriving, never a threat of losing it. Manage feeding and high-value chews to avoid conflict while you build that association. For anything beyond mild guarding, bring in a certified force-free behavior professional.
Pushy adolescent “testing”
As the dog socially matures, expect it to push boundaries and re-test rules. Stay calm, consistent, and predictable; keep rewarding the behaviors you want and managing the setups where it fails. This is normal development, not a bid for “dominance” — treating it as a power struggle is how good dogs get ruined.
Jumping Up to Greet
Jumping up is almost always a friendly behavior: your dog wants to reach your face and say hello, and it has learned that launching upward earns attention, talking, or touch. The force-free fix is not to punish the jump but to make four paws on the floor the thing that pays, and to stop accidentally rewarding the jump with eye contact, words, or hands.
Knees in the chest, shoving, or shouting all read as engagement (or as a scare) and tend to make an excited dog escalate. We reward the behavior we want and quietly remove the payoff for the one we don't (LIMA / positive reinforcement, the standard endorsed by AVSAB, 2021).
Reward four-on-the-floor at greetings›
Step by step
- Pre-train a default sit and a hand target ('touch') away from the door, when the dog is calm, so you have a known incompatible behavior to ask for later.
- On approach, stand tall and still. The instant all four paws are on the floor (or the dog sits), mark ('Yes') and feed a treat delivered low, at the floor between the front paws, so the reward itself resets the dog downward.
- If the dog jumps, calmly remove the payoff: no eye contact, no talking, no touch. Turn away or step back briefly. The fun pauses the moment paws leave the ground.
- The instant paws return to the floor, re-engage and reward. Repeat so the dog learns: feet down makes good things happen, feet up makes attention disappear.
- Practice with one calm helper first, then gradually with more exciting people. Keep arrivals low-key.
- For greetings you can't yet manage, manage the environment: a leash, a baby gate, or a 'go to your mat' cue prevents the dog from rehearsing the jump while it is still learning.
Pulling on the Leash
Dogs pull because pulling works: the world is interesting, walking is rewarding, and a tight leash still moves them forward. The fix is to make a loose leash the only thing that earns forward progress, paired with a generous rate of reinforcement for walking near you. This is taught, not corrected.
Build loose-leash walking›
Step by step
- Start indoors with a fixed 4-6 ft leash (no retractable) and treats on your walking-side hip. Take one step; mark and feed at your side before the dog forges ahead. Repeat for many single steps at a very high rate of reinforcement.
- Build to 2, then 3 steps per reward, then randomize (1, 4, 2, 5) so the dog stays engaged and checks in.
- When the leash goes tight, STOP. Forward progress is the reward that pulling must never earn. Wait, encourage the dog back toward you, then take 2-3 nice steps before rewarding — so the pattern is 'walk near me = treat,' not 'pull, come back, get fed.'
- Optional: when the dog forges, quietly turn and walk the other direction, rewarding when it catches up at your side.
- Add a 'go sniff' release as a real-world reward. Sniffing is a powerful, calming reinforcer; permission to investigate pays the dog for a stretch of loose-leash walking.
- Master the mechanics indoors and in the yard before taking them to busier, more distracting places, lowering your criteria in each new environment.
Nuisance Barking for Attention
Demand barking — barking at you for attention, food, play, or to make a door open — persists because it works. The force-free fix has two halves: reinforce a calm incompatible behavior the dog can do instead (a dog lying on its mat largely can't bark at you), and stop letting the barking produce its payoff (DRA/DRI — differential reinforcement of an alternative/incompatible behavior).
First, make sure this is ordinary demand barking and not distress. Barking driven by fear, isolation, or being left alone is a different problem (see the separation-distress module) and must never be 'waited out.'
Reduce demand barking force-free›
Step by step
- Identify the reinforcer maintaining the barking (your attention, food, play, the door opening) so you can control it.
- Pre-train a calm alternative to fluency, away from the demand situation — usually go-to-mat / settle, or a four-on-the-floor sit.
- Proactively reinforce quiet BEFORE the barking starts, so calm becomes the strategy that pays. Catch and reward the silences.
- In the demand moment, withhold the payoff for barking: the bark no longer earns attention or access. Give the dog a few seconds to choose a calmer behavior, then a single prompt for the mat/sit if needed.
- The instant the dog offers quiet or goes to the mat, mark and deliver the thing it wanted (attention, the treat, the open door).
- Expect a temporary 'extinction burst' — louder or longer barking before it improves — and stay calm and consistent through it. The whole household must respond the same way; one person caving puts barking on a strong intermittent schedule.
- Meet the dog's underlying needs with daily enrichment (sniffing, foraging, puzzles) and a predictable routine so it isn't barking out of boredom.
When Recall Falls Apart
A recall that 'used to work' usually breaks for predictable reasons: the cue got poisoned (it started predicting the end of fun, a bath, or a scolding), the reward stopped being worth more than the environment, you called when you couldn't follow through, or you've simply outpaced the dog's training in a distracting place. Adolescent dogs in particular show a phase where trained cues get flaky — this is normal development, not defiance, and the answer is to re-build, not to punish.
Rebuild a reliable recall›
Step by step
- Stop calling the dog when you can't make it worth the dog's while or can't gently follow through — every ignored cue weakens it. Use a long line (15-30 ft, clipped to the harness) so you can prevent failures while you rebuild.
- If the old word feels poisoned, pick a brand-new recall cue and start fresh; the old one carries baggage.
- Re-charge the cue indoors with zero distractions: say it once, and when the dog commits to you, mark and JACKPOT (several treats) at your legs. Make arriving wildly worth it.
- Never call the dog for things it dislikes (baths, nail trims, leaving the park). When you must do something the dog won't love, go get the dog instead of calling.
- Build distraction gradually, raising only ONE of distance, distraction, or excitement at a time and lowering the others. Aim for roughly 80% success before making it harder.
- Add a separate, rarely-used emergency cue paired with a huge reward (about ten rapid treats in a row). Practice it occasionally and never burn it on low-stakes moments, so it stays a sure thing.
- Often, let the dog go back to what it was doing after it checks in — being recalled shouldn't reliably mean the fun ends.
Counter-Surfing & Stealing Food
Counter-surfing is self-reinforcing: the very first time the dog finds a sandwich on the counter, the jackpot teaches it that counters are slot machines. Because the reward (food) is so powerful and is delivered by the environment, not by you, the most important tool is management — preventing the rehearsal — combined with teaching a strong, well-paid 'leave it' and rewarding feet-on-the-floor.
Stop counter-surfing humanely›
Step by step
- Manage first and foremost: keep counters and tables clear, push food back from the edge, and use baby gates or a tether so the dog physically can't practice surfing while it's learning. Every successful steal makes the habit stronger.
- Teach 'leave it' via trade-up, away from the kitchen. Closed fist with a treat; the instant the dog backs off or looks away, mark and reward from your OTHER hand. Progress to food on the floor, then to walking past temptations — always paying from your hand.
- Build an impulse-control default ('It's Your Choice'): the dog's own choice to back away from food makes the food appear; lunging makes access close. This teaches self-control rather than relying on you to police every counter.
- Reward four-on-the-floor and a 'go to your mat / station' during food prep, so the dog has a paid job that is incompatible with jumping up to the counter.
- Feed the dog its own meals and chews on a predictable schedule so it isn't foraging out of hunger, and pick up dishes promptly.
- If the dog already has the item, do NOT chase it or pry its mouth open — that teaches guarding and gulping. Cheerfully trade up for something equal or better (see the 'drop it' / trade-up method).
Over-Arousal & the Missing Off-Switch
Some dogs get 'wired' — frantic zoomies, escalating mouthing, ignoring cues they know, unable to settle. Over-arousal isn't disobedience; it's a dog whose nervous system has tipped past the point where it can think or learn. Pushing through it (or adding more exercise) usually makes it worse. The fix is to lower arousal, protect rest, and actively train calmness as a skill.
Build an off-switch and lower arousal›
Step by step
- When the dog is over the top, stop adding stimulation. Lower your voice and energy, slow your movements, and reduce the things winding it up rather than trying to drill obedience through the frenzy.
- Offer a down-regulating activity: licking and chewing are naturally calming. A stuffed chew or lick mat can help a wired dog settle into rest.
- Capture calm all day: whenever the dog chooses to lie down quietly on its own, calmly drop a treat between its paws without exciting it. You are paying the behavior you want more of.
- Train mat relaxation: reward the dog for going to a mat and, crucially, mark genuine RELAXATION — hip rolled to one side, head lowered, soft eyes, a sigh — not a tense, ready-to-spring down. Use low-value treats delivered slowly and calmly.
- Once calm-on-the-mat is solid, gently add mild distractions one at a time (a knock, you stepping away), keeping the dog succeeding, so the off-switch works even when life is interesting.
- Favor calm, low-arousal games (sniffing, foraging, find-it, gentle puzzles) over repetitive high-arousal games that crank the dog up; always follow enrichment with rest.
Mild Separation-Related Distress (Get Help Early)
Some dogs struggle to be left alone — pacing, whining, drooling, scratching at exits, not settling, or refusing food the moment you go. This is genuine distress (a panic response), not 'acting out,' and it must be handled very differently from ordinary demand barking. The evidence-based approach is graduated, sub-threshold alone-time: building duration so slowly that the dog never actually rehearses panic.
Start force-free alone-time work›
Step by step
- Suspend real over-threshold absences as much as you can during the work (sitters, family, taking the dog along). Every full-blown panic episode sets progress back.
- Use a camera to find the dog's baseline: the exact duration it stays genuinely relaxed — no pacing, panting, whining, scratching, or drooling.
- Run tiny graduated departures, always returning BEFORE any sign of stress: pick up your keys and sit back down; walk to the door and return; step out for one to three seconds and come back. Build in small, often non-linear increments based on what the camera shows.
- Vary your pre-departure cues (keys, shoes, coat) during calm moments so they stop predicting absence and triggering anxiety.
- Keep arrivals and departures low-key and undramatic. Never scold anxious behavior.
- Reinforce the dog settling independently while you're home, and use enrichment to support — but understand enrichment supports the desensitization, it does not replace it.
- If confinement is part of the trigger, don't force a closed crate; an open pen or dog-proofed room is usually better, and the real goal is tolerating your absence.
Before You Train: Rule Out Pain First
The single most important troubleshooting rule applies to every scenario in this section: a sudden behavior change is a medical question until proven otherwise. A large share of dogs referred for behavior problems turn out to be in pain (Mills et al.). Discomfort, illness, and declining senses masquerade as 'training problems' constantly — and no amount of training fixes a behavior that is being driven by pain.
See your vet BEFORE treating it as training when you notice:
0/6
This content is educational and is not a substitute for veterinary or in-person professional advice. For any behavior that breaks skin, escalates, or frightens you, work with a qualified force-free trainer or a veterinary behaviorist.
Health & Heat Safety
The Giant Schnauzer is not brachycephalic — it has a normal muzzle and airway — so its heat risk is different from a flat-faced breed's, but it is still real and it is specific. This is a large, often dark-coated, densely furnished, high-drive working dog, and in Arizona heat the danger is over-exertion: the breed's drive to work and keep going overrides its own self-regulation. A Giant Schnauzer will run itself into heat trouble chasing a job long after a lazier dog would have quit. A dark, dense double coat only adds radiant heat load.
Treat this as general canine exertional-heat physiology adapted to this breed — not an airway problem. Apply the platform's heat discipline (grounded in the corpus KEY-FACTS thresholds):
0/6
Bloat (GDV) in deep-chested dogs: lowering the risk every day
Gastric dilatation-volvulus (GDV), commonly called "bloat," is a life-threatening emergency in which the stomach fills with gas and fluid and can then twist on itself. Dogs with a deep, narrow chest are at higher risk because of how the stomach hangs and moves inside the body. You cannot train bloat away, but a few calm, consistent feeding habits meaningfully lower the everyday risk. None of this replaces veterinary advice — it is the daily-management piece that sits alongside it.
Why feeding habits matter
Two everyday patterns appear to load the stomach: gulping large amounts of food or air at once, and a single huge meal followed by activity. Rapid eating makes a dog swallow air along with food (aerophagia), and a big, gas-filled stomach is a stomach more able to twist. The kind, low-effort fixes are to slow the eating down, split the daily ration into smaller meals, and keep things calm around mealtimes (this management framing follows the GI/feeding guidance in the site's research corpus, 07-health-husbandry.md).
0/7
Talk to your vet about preventive options
For dogs in the higher-risk, deep-chested group, there is a surgical option called a prophylactic gastropexy — the stomach is tacked to the body wall so it cannot twist. It is most often discussed as something to do at the same time as a spay or neuter, so there is only one anesthetic event. Whether it makes sense for your individual dog is a conversation for your veterinarian; bring it up at a wellness visit rather than waiting for a crisis. A vet can weigh your dog's build, age, and overall risk and explain what the procedure does and does not prevent.
Bloat (GDV) emergency: know the signs, act in minutes
If the stomach twists, GDV moves from uncomfortable to fatal within hours. There is nothing you can do at home to fix it — survival depends on getting to a veterinarian or emergency hospital fast. The single most important thing you can do is recognize it early and leave immediately. Learn these signs now, before you ever need them, and keep your nearest emergency vet's number somewhere you can find it instantly.
If you suspect bloat›
Step by step
- Stop and look at the whole dog: is the belly distended, is the dog retching without producing anything, is it unable to settle?
- Call your veterinarian or nearest emergency hospital right now and tell them you suspect bloat/GDV so they can prepare for your arrival.
- Get your dog to the car calmly and gently — keep yourself low-key, because panic and rough handling add stress your dog does not need.
- Do not give food, water, or any home remedy, and do not try to make your dog vomit.
- Drive to the hospital without delay; have someone else drive if you can, so you can keep your dog calm and monitor breathing on the way.
Why speed beats everything else
A twisted stomach cuts off its own blood supply and presses on major vessels, so a dog can decline very quickly. There is no force-free training intervention, no waiting period, and no wait-and-see version of GDV. Recognizing the signs and acting in minutes is the whole skill here. When in doubt, treat a distended abdomen with unproductive retching as an emergency and let the veterinarian rule it out — it is far safer to make an unnecessary trip than to miss a real one.
GDV (Gastric Dilatation-Volvulus / bloat)›
A life-threatening emergency in which the stomach distends with gas and fluid and may twist on itself, cutting off blood flow. Most relevant in deep-chested dogs and those that swallow a lot of air while eating. Recognize acute abdominal distension with unproductive retching, restlessness, and distress, and seek immediate veterinary care — it is time-critical (per the corpus glossary and 07-health-husbandry.md).
Gear
Paid affiliate links. The product links below are Amazon affiliate links — if you buy through them we may earn a commission, at no extra cost to you. As an Amazon Associate we earn from qualifying purchases. We only suggest gear that fits this breed's documented needs.
Well-fitted Y-front no-pull harness
Safety & Walking
A Giant Schnauzer is a powerful 60–85 lb working dog that can generate serious leash force, especially as an adolescent still learning loose-leash walking. A true Y-front harness routes every ounce of that pulling across the chest and shoulders and keeps pressure entirely off the throat and windpipe, which is the LIMA standard for any leash tension. Choose a large/XL with independent chest and girth adjustment so it clears the deep chest without gapping at the shoulders. A flat collar is for ID only — never the point you attach a leash to on a dog this strong.
Balance Harness (Buckle-Neck, Large/XL) - Blue-9
Its six independent adjustment points let you fit a Giant Schnauzer's deep barrel chest and broad shoulders precisely, so the true Y-front sits off the windpipe while the front clip lets you redirect a strong adolescent's pulling without any neck pressure.
The buckle-neck version goes on without dragging over the head, useful for a big, sometimes wary guardian breed that appreciates low-fuss handling around the face.
Balance Harness (Buckle-Neck, Large/XL) - Blue-9View this productFront Range Dog Harness (Large/XL) - Ruffwear
A padded, load-spreading Y-front vest with both a chest and back attachment, built for large active dogs that hike and work; the wide chest panel distributes a Giant's force comfortably instead of concentrating it on a thin strap.
Durable enough for a high-drive dog that will wear it for long enrichment walks, and the aluminum front V-ring gives you a redirection point for polite-walking practice with zero throat involvement.
Front Range Harness - RuffwearView this productFreedom No-Pull Harness (Large, with training leash) - 2 Hounds Design
The velvet-lined girth strap resists chafing in the armpit of a broad-chested, hard-working dog, and the front martingale clip gently tightens across the chest to discourage pulling without ever loading the neck.
A trainer-favorite Y-style design that pairs a front and back clip, giving you a two-point setup that gives real steering control over a powerful Giant Schnauzer on training walks.
Freedom No-Pull Harness (front and back clip) - 2 Hounds DesignBrowse options on AmazonFlat ID collar
Safety & Walking
The flat collar's only job is to carry ID tags — it is never the attachment point for leash force on a dog this strong. A wide, flat buckle collar sits comfortably on a Giant Schnauzer's substantial neck and keeps a legible tag on the dog at all times, while all pulling and steering happen through the harness above.
Personalized Embroidered Dog Collar (Large) - GoTags
The name and phone number are stitched directly into the webbing, so a Giant Schnauzer that shakes off and works hard keeps permanent, silent ID with no dangling tags to snag on brush or crate wire.
Large sizing fits a broad neck comfortably as an ID-only collar while the harness carries every bit of leash tension.
Personalized Embroidered Dog Collar - GoTagsView this productSoft & Safe 3M Reflective Neoprene Padded Collar (Large) - Blueberry Pet
Neoprene padding keeps a wide flat collar from rubbing the coat and skin on a big, active dog, and the 3M reflective stitching adds visibility for early-morning or after-dark walks in the Arizona heat window.
Sized for a large neck and used purely to hold tags, so it stays light and comfortable while the Y-front harness does the pulling job.
Soft & Safe 3M Reflective Neoprene Padded Collar - Blueberry PetView this productFixed 4–6 ft walking leash
Safety & Walking
A fixed 4–6 ft leash gives you consistent, predictable control of a strong, intelligent guardian dog — no retractable leashes, which teach constant low-level pulling and can fail under a Giant Schnauzer's power. Look for wide, tough webbing or climbing rope with a padded handle and a heavy welded clip that can take real force from a 60–85 lb dog.
BAAPET 5 FT Heavy-Duty Rope Leash (1/2") - BAAPET
The thick 1/2-inch climbing-rope build and heavy swivel clip are rated for strong dogs, giving a secure, no-burn grip when a Giant Schnauzer surges toward something interesting.
The soft padded handle protects your hand during that surge, so you can hold position calmly and reward the dog for coming back to a loose leash rather than being yanked.
BAAPET 5 FT Heavy-Duty Rope Leash (1/2") - BAAPETView this productMax and Neo Reflective Nylon Leash (6 ft x 1") - Max and Neo
Wide 1-inch nylon webbing and a stout bolt snap stand up to a powerful working breed, while the neoprene-padded handle and full-length reflective stitching keep control comfortable and visible on dawn walks.
The 6 ft length gives an adolescent Giant Schnauzer a little room for polite sniffing without surrendering the steering you need in a strong dog.
Reflective Nylon Dog Leash (6 ft x 1") - Max and NeoView this productTuff Mutt Heavy-Duty Bungee Leash (4 ft) - Tuff Mutt
A rugged, reflective leash built for large, strong dogs, with a shorter 4 ft length that keeps a powerful Giant close for structured heeling and street crossings.
The reinforced stitching and metal hardware are made to absorb the force of a big dog, so the leash won't be the weak link during loose-leash training.
Tuff Mutt Heavy-Duty Bungee Leash (4 ft) - Tuff MuttView this product15–30 ft biothane long line
Safety & Walking
Recall and sniff-based enrichment are core needs for a high-drive Giant Schnauzer, and a long line lets you give real freedom while keeping the dog safe and the pressure on the harness, never the neck. Choose a wider, tougher biothane (5/8"–3/4") for a big powerful dog, clip it to the Y-front harness, and always keep a soft "J" of slack — a long line is for freedom and recall practice, not for jerking.
Biothane Working Tracking Long Line (3/4" x 20 ft or 30 ft) - Viper (Dogline)
Genuine waterproof biothane wipes clean, won't hold water or burrs, and in the wider 3/4-inch width has the strength to hold a strong 60–85 lb Giant Schnauzer during recall and long-line hikes.
The solid brass snap clips to the harness so all the force of a sudden lunge lands on the chest plate, never the throat.
Biothane Working Tracking Long Line (3/4" x 20 ft or 30 ft) - Viper (Dogline)View this productMendota Check Cord / Long Line (Biothane, 5/8" x 20–30 ft) - Mendota Pets
Soft yet extremely durable biothane that resists snagging in desert brush and wipes clean after a dusty session, in a width substantial enough for a powerful working dog.
Ideal for building a rock-solid recall on a Giant Schnauzer: give the dog room to range and sniff, then reward big for a fast, willing return before you ever add distraction.
Mendota Check Cord / Long Line (Biothane, 5/8" x 20–30 ft) - Mendota PetsView this productNIMBLE Waterproof Recall Long Line (5/8" x 30 ft) - NIMBLE
A tough PVC-coated long line that rinses clean and dries fast, well suited to a Giant Schnauzer's messy, high-energy outdoor sessions in dirt and grass.
The 30 ft length gives ample room for distance-recall reps on the harness, so a smart, driven dog gets to practice choosing you from far away — the foundation of reliable off-line recall later.
Waterproof Recall Training Long Line (1/2" x 30 ft) - NIMBLEView this productBasket muzzle (cooperative-care / management)
Safety & Walking
A well-fitted basket muzzle is standard cooperative-care and management gear for any large, powerful dog — never a punishment tool. Muzzle-training a Giant Schnauzer builds a positive emotional response so vet visits, grooming, first-aid, and any scavenging or reactivity management are safer and calmer for everyone. Choose a roomy basket that lets the dog fully open its mouth to pant, drink, and take treats, and introduce it gradually with food so the muzzle predicts good things.
Baskerville Ultra Muzzle (Size 5 / 6) - Baskerville (Company of Animals)
The most widely vet-recommended basket muzzle; its heat-moldable frame can be softened in warm water and reshaped to fit a Giant Schnauzer's longer muzzle, and the open basket lets the dog pant, drink, and take treats through the front — essential for reward-based muzzle conditioning.
Framed strictly as cooperative-care gear for vet and grooming handling, it lets you keep a large dog comfortable and safe without any aversive restraint.
Baskerville Ultra Muzzle (Size 5 / 6) - Baskerville (Company of Animals)View this productTrust Your Dog / Baskerville-style Wire Basket Muzzle (Large breed sizing) - Birdwell / JYHY (wire basket, large)
A padded, adjustable wire-basket muzzle sized for large working breeds gives a Giant Schnauzer's long muzzle full clearance to open, pant, and drink while providing secure management for vet and grooming procedures.
Look for a model with a leather nose pad and multiple straps so it sits stably on a big active head — introduced with treats, it becomes a tool the dog willingly wears.
Trust Your Dog / Baskerville-style Wire Basket Muzzle (Large breed sizing) - Birdwell / JYHY (wire basket, large)Browse options on AmazonClicker / verbal marker
Training Essentials
Giant Schnauzers are famously intelligent and learn fast — which means precise, consistent marking pays off enormously. A clicker (or a crisp "Yes") gives this quick-thinking working breed the exact information it craves about which behavior earned the reward, keeping training clear, fair, and fully force-free.
Pro-Training Clicker (Deluxe) - StarMark
An ergonomic clicker with a large easy-press button and a crisp, distinct click that carries clearly during the higher-energy, more distracting sessions a driven Giant Schnauzer needs.
Consistent marking helps a smart dog build behaviors quickly, so you can keep sessions short, upbeat, and mentally satisfying.
Pro-Training Clicker (Deluxe) - StarMarkView this productClik-R Training Tool - PetSafe
A compact clicker with an elastic finger band so you can mark and treat without fumbling — handy when you're managing a large, enthusiastic dog and a treat pouch at the same time.
Reliable marking keeps a clever Giant Schnauzer engaged and confident that reward-based training is a game worth playing.
Clik-R Training Tool - PetSafeView this productTraining Clicker with Wrist Strap (Multi-Pack) - EcoCity
A best-value multi-pack with wrist straps so there's always a clicker at hand in the yard, car, and training bag — useful for a breed you'll be training across many contexts.
The loud, consistent click gives clear feedback to a fast-learning dog, supporting crisp, positive sessions.
Training Clicker with Wrist Strap (multi-pack) - EcoCityView this productTreat pouch + tiny soft high-value treats
Training Essentials
A high-drive Giant Schnauzer works hard for you, so reward delivery has to be fast and generous with tiny, soft, quickly-swallowed morsels that keep the rate of reinforcement high without loading calories. A hands-free pouch gives instant one-handed access while you steady a big, eager dog; keep treats pea-to-dime-sized and count them against the daily ration to keep a large working dog lean.
Treat Pouch Sport (spring-hinge) - PetSafe
A spring-hinged mouth snaps open for instant one-handed rewards and shut to keep treats fresh, which matters when you're rewarding a strong, driven dog at a high rate.
The belt clip and waist strap keep both hands free to manage a powerful Giant Schnauzer on the leash while you mark and feed.
Treat Pouch Sport (spring-hinge) - PetSafeView this productMini Naturals Training Treats (Chicken) - Zuke's
Tiny, soft, low-calorie morsels you can deliver by the dozen, ideal for the high-repetition sessions a smart Giant Schnauzer thrives on without tipping a big dog toward excess weight.
Easy to break even smaller for rapid-fire reinforcement during recall and focus work.
Mini Naturals Training Treats (Chicken) - Zuke'sView this productSoft Training Bites (Lamb & Salmon or similar) - Wellness
Very soft and moist, easily torn into small pieces and high-value enough to hold a working dog's focus around distractions.
Perfect for a Giant Schnauzer's demanding recall and impulse-control drills, where you need frequent, fast rewards to keep enthusiasm high.
Soft Training Bites (Lamb & Salmon) - WellnessView this productRelaxation / place mat
Training Essentials
A dedicated relaxation mat gives a busy, alert guardian breed a clear "off switch" — a portable spot that cues settle-and-stay-calm at home, at the vet, and on trips. Teaching a Giant Schnauzer to switch off is as important as any obedience skill: this is a dog bred to work and watch, and structured relaxation on a mat channels that intensity into learned calm. Pick a large, flat, washable mat that supports a big-boned dog and travels easily.
Loft Wander Dog Bed / Travel Bed Roll (Large) - Kurgo
Rolls into a carry bundle with a water-resistant top and non-slip bottom, giving a large Giant Schnauzer a consistent "place" target you can bring to training class, the car, and the patio.
The flat, breathable design lets a big double-coated dog stretch out and cool down while practicing settle, so relaxation training doesn't add heat stress.
Loft Wander Dog Bed (Travel Bed Roll, Large) - KurgoView this productHighlands Dog Pad (packable foam pad) - Ruffwear
A packable insulating pad that cushions a large, heavy dog on hard floors at hotels, campsites, or the vet, giving a Giant Schnauzer a familiar surface that cues calm anywhere.
Lightweight and durable, it suits an active dog you'll take on adventures where a settled off-switch keeps everyone relaxed.
Highlands Dog Pad (packable foam) - RuffwearView this productWater-Resistant Orthopedic Dog Mat (Large / XL) - Furhaven
A low-profile orthopedic foam mat with a non-skid backing and washable cover, sized for a large breed so a 60–85 lb Giant Schnauzer can fully settle and support its joints.
The flat, open shape makes an ideal home "place" mat where you reinforce long, calm down-stays for an intense working dog.
Water-Resistant Orthopedic Dog Mat (Large / XL) - FurhavenView this productCorrectly sized crate and/or ex-pen
Crate & Enrichment
A Giant Schnauzer is a large dog that needs a substantial crate — big enough to stand fully, turn around, and lie stretched out — as a safe den for calm rest, house-training, and travel. Size for the adult dog (a 48" crate suits most Giants) and use a divider while a pup grows so the space stays just right for house-training. Ample ventilation matters for a big, dark, double-coated dog that carries real heat.
iCrate 48-Inch Double Door Folding Crate with Divider - MidWest Homes for Pets
The 48-inch size is built for extra-large breeds, giving an adult Giant Schnauzer room to stand and turn, while the included divider grows the space with a puppy to support house-training.
Open wire sides keep airflow ample for a large double-coated dog, and the folding frame makes a heavy crate manageable to move and store.
iCrate 48-Inch Double Door Folding Crate with Divider - MidWest Homes for PetsView this productNew World 48-Inch Folding Metal Crate with Divider - New World Pet Products
A popular 48-inch wire crate with a leak-proof pan and divider panel, sized for the largest breeds so an adult Giant Schnauzer has a proper den.
The airy mesh construction suits a heavy-coated dog that needs ventilation, and the divider makes it a long-term crate you buy once for puppy through adult.
New World 48-Inch Folding Metal Crate with Divider - New World Pet ProductsView this productFoldable Metal Exercise Pen (48-Inch, 8 Panels) - MidWest Homes for Pets
A tall 48-inch, 8-panel pen creates a large, ventilated containment zone that an athletic, jumping-capable Giant Schnauzer can't easily clear, useful for safe management indoors or in a shaded yard.
Pairs with the crate to give a high-energy young dog room to relax loose without full run of the house before it's earned that freedom.
Ginormous Heavy-Duty / Extra-Tall Exercise Pen - MidWest Homes for PetsView this productSnuffle mat, food puzzles & lick mat
Crate & Enrichment
This is first-order gear for a Giant Schnauzer. A brilliant, high-drive working breed will invent its own (often destructive) jobs if its mind isn't worked, so daily foraging, puzzle, and licking enrichment is core management, not a luxury. Rotate challenging puzzles, snuffle foraging, and calming lick mats to meet a Giant's serious mental-workload needs and prevent boredom-driven problem behaviors.
Snuffle Mat (Large, Interactive Foraging Mat) - AWOOF
Dense fabric strips hide kibble for extended nose-work foraging, giving a smart Giant Schnauzer a satisfying job that tires the mind far more than a quick physical outlet.
Scatter part of a meal into it to slow eating and channel a working dog's drive into calm, focused sniffing.
Snuffle Mat (Large, Interactive Foraging Mat) - AWOOFView this productAdvanced Interactive Treat Puzzle (Level 2–3) - Outward Hound / Nina Ottosson
A Giant Schnauzer solves beginner puzzles in seconds, so a higher-difficulty sliding/flipping puzzle gives the sustained problem-solving this intelligent breed actually needs.
Rotating harder puzzles keeps a driven mind engaged and prevents the boredom that fuels destructive behavior in under-stimulated working dogs.
Advanced Interactive Treat Puzzle (Level 2–3) - Outward Hound / Nina OttossonView this productLickiMat Classic / Tuff (Large) - LickiMat
Spread wet food or a bit of peanut butter across the textured surface for calming, low-arousal licking that helps an intense guardian breed decompress and settle.
The tougher "Tuff" version stands up to a large dog's stronger tongue and paws, making it a durable daily wind-down tool in the crate or on the mat.
LickiMat Classic / Tuff (Large) - LickiMatView this productFrozen stuffable rubber toys
Crate & Enrichment
A powerful-jawed Giant Schnauzer needs genuinely tough, appropriately large stuffable toys — undersized or flimsy toys are a choking and destruction risk. Stuff with food and freeze to create long-lasting enrichment that keeps a high-drive dog happily occupied during crate time and alone-time, building calm independence and preventing boredom chewing.
KONG Extreme (Large / XL) - KONG
Made from KONG's toughest black rubber for powerful chewers and available in Large/XL to suit a Giant Schnauzer's strong jaw, so it holds up as a durable stuffer rather than becoming a hazard.
Freezer-safe: pack it with food and freeze for hours of calm, focused enrichment that helps a driven dog settle in the crate.
KONG Extreme (Large/XL) - KONGBrowse options on AmazonZogoflex Toppl Treat Toy (Large) - West Paw
A tough, freezable, dishwasher-safe rubber toy with a wide opening; the large size gives a Giant Schnauzer a substantial foraging puzzle that dispenses food as it's nudged and licked.
Freeze it stuffed to extend the challenge, turning meals into the sustained mental work this intelligent breed craves.
Zogoflex Toppl Treat Toy (Large) - West PawView this productClassic Bone / Stuffable Chew (Large, Tough Rubber) - KONG
The original stuffable in a large size, gentle on teeth yet treat-holding for calm crate enrichment, an affordable everyday option to rotate with the Extreme.
Rotating several frozen stuffers means a high-energy Giant Schnauzer always has a legal, engaging job during downtime.
Classic Bone / Stuffable Chew (Large, Tough Rubber) - KONGView this productEnzymatic cleaner
Grooming & Cleanup
Thorough enzymatic cleanup fully removes the scent cues that trigger a dog to re-mark the same spot, which matters when house-training a large puppy whose accidents are correspondingly large. Enzymes break down urine at the source rather than masking it, keeping potty-training on track and your home odor-free.
Stain & Odor Eliminator Enzyme Cleaner (Professional Strength) - Rocco & Roxie Supply Co.
A widely trusted enzymatic cleaner whose enzymes consume the odor compounds in urine so a Giant Schnauzer puppy isn't drawn back to re-mark the same spot.
Buy the larger size for a big dog's bigger accidents during the house-training months.
Stain & Odor Eliminator Enzyme Cleaner (Gallon) - Rocco & Roxie Supply Co.View this productAdvanced Stain & Odor Eliminator (Severe Mess Formula) - Nature's Miracle
A long-standing enzymatic formula that keeps working on the bio-source until urine, feces, and vomit odors are gone, removing the residual scent that undermines potty-training.
The severe-mess strength suits the scale of cleanup a large-breed puppy can create.
Advanced Stain & Odor Eliminator (Severe Mess Formula) - Nature's MiracleView this productWire-coat grooming kit
Grooming & Cleanup
The Giant Schnauzer's harsh, wiry double coat is one of the breed's biggest ownership commitments. The coat is traditionally maintained by hand-stripping or carding to keep its correct hard texture and weather resistance; regular clipping softens the coat and can dull color. Between professional grooming, you'll need slicker brushes, a metal comb, a stripping/carding tool, and dematting help — plus routine ear and nail care. Introduce every tool gradually and pair it with treats so grooming stays a cooperative, force-free experience for a big, sometimes-wary dog.
Slicker Brush + Undercoat Rake / Dematting Combo - Chris Christensen (or Andis) slicker & rake
A firm slicker brush plus an undercoat rake tackles both the harsh outer jacket and the soft undercoat of a Giant Schnauzer, preventing the mats that form in the leg furnishings and beard.
Regular brushing keeps the double coat working as insulation and cuts down on the tangles that make a big dog dread grooming.
Slicker Brush + Undercoat Rake / Dematting Combo - Chris Christensen (or Andis) slicker & rakeBrowse options on AmazonHand-Stripping Knife / Carding Tool Set - Andis (or Mars Coat King) stripping knife
Hand-stripping and carding pull out dead coat to preserve the correct hard, weatherproof texture of a Giant Schnauzer's jacket — the technique the breed's coat is designed for, unlike clipping which softens it.
Used gently in short, treat-paired sessions, it becomes part of a cooperative grooming routine rather than something forced on a large dog.
Hand-Stripping Knife / Carding Tool Set - Andis (or Mars Coat King) stripping knifeView this productWhisper-Quiet Dog Nail Grinder + Ear Cleanser - Casfuy nail grinder / Virbac Epi-Otic
A low-noise, low-vibration nail grinder lets you keep a large, strong dog's nails short without the startle of loud clippers, supporting relaxed cooperative-care handling of the paws.
Pair with a gentle, vet-style ear cleanser for the routine ear care a bearded, furnished breed needs to stay comfortable and infection-free.
Whisper-Quiet Dog Nail Grinder + Ear Cleanser - Casfuy nail grinder / Virbac Epi-OticView this productBloat-aware feeding gear
Grooming & Cleanup
The Giant Schnauzer is a large, deep-chested breed, and deep-chested dogs are at elevated risk of bloat / GDV (gastric dilatation-volvulus) — a life-threatening emergency where the stomach distends and can twist. The best-supported management is to slow fast eating (a slow-feeder bowl reduces gulping and air-swallowing) and keep a big dog calm and at rest for a while after meals rather than exercising on a full stomach. Learn the emergency signs — a distended abdomen with unproductive retching, restlessness, and distress — and treat them as an immediate veterinary emergency. Note that raised bowls are not a blanket recommendation and have been associated with increased bloat risk in some dogs; use elevation only under veterinary guidance. This is educational, not veterinary advice.
Fun Feeder Slo-Bowl (Large) - Outward Hound
Ridged channels force a large, fast-eating Giant Schnauzer to work the food out slowly, reducing the gulping and air-swallowing that contribute to gastric distension in deep-chested dogs.
The large size holds a big-breed portion, making it an easy daily habit to slow every meal.
Fun Feeder Slo-Bowl (Large) - Outward HoundView this productStainless Steel Slow-Feeder Bowl (Large) - JASGOOD / Neater Pets slow feeder
A durable stainless slow-feeder insert slows a powerful eater while being easy to sanitize, which matters for a large dog's high-volume meals.
The non-slip base keeps a determined Giant Schnauzer from sliding the bowl around while it works to eat more calmly.
Stainless Steel Slow-Feeder Bowl (Large) - JASGOOD / Neater Pets slow feederView this productNon-slip runners & traction mats
Spine & Mobility
A large, fast-growing, athletic breed benefits from secure footing to protect developing joints and prevent slip injuries on smooth floors. Non-slip runners give a Giant Schnauzer reliable traction on tile and hardwood — especially valuable through the long growth period (large-breed growth plates close later) when repetitive slipping, jumping, and hard impact should be limited. Keep young dogs on grippy footing and let them mature before high-impact activity.
Non-Slip Rubberback Runner Rug (Long Runner) - Ottomanson
A machine-washable low-pile runner with full rubber backing that grips hardwood, giving a large Giant Schnauzer sure footing on the slick hallways and stairs landings where big dogs skid.
Reliable traction protects growing joints from the twisting slips that repeated hard flooring can cause in a heavy, athletic pup.
Non-Slip Rubberback Runner Rug (Long Runner) - OttomansonView this productAnti-Fatigue / Runner Traction Mats (Set) - Gorilla Grip runner mats
Grippy, washable mats you can lay along a big dog's main indoor pathways to create a continuous traction route from crate to door.
Steady footing lets a powerful Giant Schnauzer move and change direction confidently indoors without slipping and straining a joint.
Anti-Fatigue / Runner Traction Mats (Set) - Gorilla Grip runner matsBrowse options on AmazonCooling kit: cooling mat/vest, portable water & shade
Heat & Health Safety
A Giant Schnauzer's large body and dense, often dark double coat mean it carries and holds real heat — a first-order concern in Arizona. High-drive dogs also want to keep working past the point that's safe, so you manage the environment: walk in the cool early-morning window, provide shade and constant water, use cooling gear, and stop exercise before a big dog overheats. Never leave any dog in a parked car, even briefly. This is educational, not veterinary advice; a dog that overheats needs a vet.
Swamp Cooler Cooling Vest (Large) - Ruffwear
An evaporative cooling vest that you wet and wring; as water evaporates it draws heat off a large, heavy-coated Giant Schnauzer's core during warm-weather activity.
Sized for big dogs, it helps extend the safe outdoor window for an athletic breed while keeping pressure off the neck and letting the dog move freely.
Evaporative Cooling Vest / Coat (large dog) - Ruffwear (Swamp Cooler) / Canada PoochView this productCool Pet Pad (Self-Cooling Gel Mat, Large/XL) - The Green Pet Shop
A pressure-activated gel mat that recharges itself with no water or power, giving a big Giant Schnauzer a cool surface to lie on indoors during the hottest hours.
The large/XL size fits a 60–85 lb dog fully, so the whole body benefits from the cooling contact.
Cool Pet Pad (Self-Cooling Gel Mat, Large/XL) - The Green Pet ShopView this productPortable Dog Water Bottle & Bowl (Large Capacity) - MalsiPree / Highwave AutoDogMug
A leak-proof one-handed dispenser keeps a large, heat-prone Giant Schnauzer hydrated on early-morning Arizona walks; choose a bigger capacity to match a big dog's water needs.
Frequent water offers on the trail are part of the heat-safety system that lets an active dog work without tipping into heat stress.
Portable Dog Water Bottle with Bowl (large capacity) - MalsiPree / HighwaveView this productPet thermometer + posted emergency card
Heat & Health Safety
For a large, dark-coated working dog in a hot climate, a fast pet thermometer lets you objectively check core temperature if you suspect overheating, and a posted emergency card (your 24-hour ER vet, poison control, and heatstroke first-aid steps) means anyone in the home can act fast. Normal canine temperature is about 100.5–102.5°F; heatstroke first aid is to cool first (cool water plus air movement) then transport. Any suspected heatstroke needs veterinary care even if the dog seems to recover. This is educational, not veterinary advice.
DTK-117 Fast-Read Pet Thermometer (waterproof, flexible tip) - iProven
A pet-calibrated digital thermometer with a soft flexible tip and quick read lets you confirm a large dog's core temperature fast if it seems overheated after activity.
Objective numbers help you decide when to start cooling and when to head to the vet, instead of guessing with a big, panting dog.
DTK-117 Fast-Read Pet Thermometer (waterproof, flexible tip) - iProvenView this productUltra-Fast Predictive Rectal Pet Thermometer (with stopper) - Good Harbor Pet (OnlyTemp)
An ultra-fast predictive read with a built-in insertion stopper gives an accurate core temperature in seconds, useful when monitoring a Giant Schnauzer that's been working in the heat.
Speed matters in a suspected heat emergency, where you want to cool first and confirm progress without prolonged restraint of a large, stressed dog.
Ultra-Fast Predictive Rectal Pet Thermometer (with stopper) - Good Harbor Pet (OnlyTemp)View this productCrash-tested travel restraint
Travel & Monitoring
A 60–85 lb Giant Schnauzer becomes a dangerous projectile in a crash if unrestrained, so secure travel is a safety essential. Use a crash-tested harness (or a crash-rated crate) that spreads forces across the chest and shoulders, never the throat — the same LIMA principle as your walking harness. Confirm the model is rated for your dog's weight, since many restraints top out below a Giant's size.
Clickit Terrain / Sport Crash-Tested Car Harness (Large) - Sleepypod
A crash-tested harness with a broad padded vest that spreads collision forces across a large dog's chest and shoulders rather than the neck, keeping a Giant Schnauzer secure and able to breathe freely.
Choose the large size rated for a big dog so the fit is snug and the crash protection valid for a Giant's weight.
Clickit Terrain Crash-Tested Car Harness (Large) - SleepypodBrowse options on AmazonImpact Crash-Tested Travel Crate (Large) - Gunner / Impact aluminum crate
For a large working dog, a crash-rated travel crate provides the strongest containment, keeping a 60–85 lb Giant Schnauzer secure and protected without any strap pressure on the body at all.
Rugged and ventilated, it doubles as a familiar den for travel, which helps an intense guardian breed settle on long drives.
Crash-Tested Travel Crate (large / aluminum) - Gunner / Rock Creek CratesBrowse options on AmazonDrive Crash-Tested Car Harness (Large) - EzyDog
A crash-tested step-in harness whose low Y-front chest plate keeps all force off the windpipe, suiting a strong Giant Schnauzer that must ride secured yet comfortable.
The large size gives a big-chested dog a proper fit, so the restraint performs as designed in a sudden stop.
Drive Dog Car Harness - Crash Tested (Large) - EzyDogView this productHome camera (motion alerts)
Travel & Monitoring
A home camera lets you baseline how a strongly-bonded guardian breed handles alone-time and catch early signs of separation distress or boredom before they become entrenched. Giant Schnauzers are devoted, watchful dogs that need taught independence; a camera with motion and sound alerts helps you see whether the dog settles or paces, so you can adjust enrichment and alone-time training. Two-way audio also lets you check in without rehearsing over-arousal.
360° Pan/Tilt Pet Camera with 2-Way Audio - TP-Link (Tapo)
A sharp pan/tilt camera with AI motion/sound alerts and two-way audio lets you track whether a Giant Schnauzer settles or paces when left alone, so you can fine-tune alone-time training with real data.
High value and easy to set up, it helps you catch early separation-distress signs in a strongly-bonded breed before they escalate.
2K Pan/Tilt Pet Camera (AI detection) - TP-Link (Tapo)View this productFurbo 360° Dog Camera (barking alerts, 2-way audio) - Furbo
A pet-specific rotating camera with real-time barking and motion alerts, useful for a vocal, alert guardian breed whose barking patterns tell you a lot about how it's coping alone.
Two-way audio lets you reassure and observe a Giant Schnauzer while building calm independence, without reinforcing panic.
360° Dog Camera (Barking Alerts, 2-Way Audio) - FurboView this productGlossary
Force-Free Training Glossary: Core Terms Every Owner Should Know
This glossary defines the core vocabulary of force-free, reward-based training — the language used throughout this library. Learning these terms isn't academic: it changes what you do with your dog. When you understand what a marker promises, what a threshold is, or why negative punishment (taking something away) is humane while shock and prong collars never are, you train more clearly and your dog learns faster and with less stress. Every method here follows LIMA (Least Intrusive, Minimally Aversive), the welfare standard endorsed by the American Veterinary Society of Animal Behavior (AVSAB, 2021) and the certifying bodies for dog trainers (CCPDT/IAABC). Terms are listed roughly in the order you'll meet them as you train.
LIMA (Least Intrusive, Minimally Aversive)›
The ethical and practical standard this whole library is built on: always choose the least intrusive, least aversive effective option, starting with meeting the dog's needs (health, nutrition, rest, enrichment), then managing the environment, then teaching with positive reinforcement — and never reaching for pain, fear, or intimidation. LIMA is endorsed by AVSAB and the major trainer-certification bodies. In plain terms: reward what you want, prevent what you don't, and never use choke, prong, slip, shock, or bark collars, alpha rolls, or 'dominance' methods. Aversive tools damage trust and can make a dog shut down or escalate rather than learn.
Marker (bridge / clicker / "Yes")›
A short, consistent signal — a clicker click or a crisp spoken "Yes" — that tells the dog the exact instant it did the right thing and that a reward is now coming. It's called a bridge because it bridges the gap between the behavior and the treat that follows a moment later. The marker is a promise: every single mark is followed by a reward, even one you gave by mistake. The sequence is always mark first, then feed (mark → brief pause → deliver the treat) — never the other way around, or the prediction breaks. The marker also ends the behavior, so the dog is free to come collect its reward. (See capturing/luring/shaping for how the marker is used to build behaviors.)
Positive reinforcement (R+)›
Adding something the dog likes (food, play, praise, sniffing, freedom) immediately after a behavior, so that behavior happens more often in future. "Positive" here means added (think plus sign), not "nice" — though in force-free training the thing added is always something the dog values. This is the engine of all the protocols in this library: you reward the behavior you want, and it grows. Pair it with management — arranging the environment so the dog rarely gets to practice the behavior you don't want — and you rarely need anything else.
Negative punishment (P-)›
Removing something the dog wants for a moment to reduce an unwanted behavior — for example, all attention and play briefly stop when puppy teeth land too hard, or you calmly stand still so pulling on leash never earns forward progress. "Negative" means subtracted (the good thing goes away); it does not mean harsh. This is the only kind of "punishment" used in force-free training, and it's gentle: it withholds a reward rather than adding pain or fear. It is completely different from — and never a gateway to — choke, prong, or shock tools, which this library never uses. Keep any time-out brief (seconds, not minutes) and avoid isolating a dog prone to distress when alone.
Counter-conditioning›
Changing how a dog feels about something from negative (or scary) to positive by pairing it with something wonderful, usually high-value food. The classic example: the nail clipper appears → tasty treat happens, over and over, until the clipper itself predicts good things and the dog relaxes. Counter-conditioning addresses the underlying emotion, not just the visible behavior — which is why simply suppressing a growl or a flinch never fixes the real problem. It's almost always paired with desensitization (below). For anything involving fear or aggression, work with a qualified force-free professional.
Desensitization›
Gradually exposing a dog to something it finds worrying at an intensity low enough that the dog stays calm — quiet, far away, or brief — then very slowly increasing the intensity only while the dog remains relaxed. Done together with counter-conditioning (the low-level exposure also predicts treats), it's the standard force-free recipe for building tolerance: harness wearing, grooming tools, traffic sounds, being handled by the vet. The cardinal rule is to stay under threshold (below) at every step. Going too fast — "flooding" a dog with full-intensity exposure — backfires and can make fear worse.
The 3 Ds (Duration, Distance, Distraction)›
The three dials that make any known behavior harder: how long the dog must hold it (Duration), how far it must travel or how far away you are (Distance), and how much competing distraction is in the environment. The core rule is to raise only ONE dial at a time and lower the others when you do — for example, when you add distractions, shorten the duration and shrink the distance. Aim for roughly 80% success before you make anything harder. Dogs also don't generalize automatically, so re-teach behaviors in each new place, starting easy.
Threshold›
The tipping point between a dog that is calm enough to learn and one that is too stressed, scared, or over-aroused to think. Under threshold = relaxed, taking food, able to respond. Over threshold = the dog is reacting, not learning. The single best "over threshold" alarm is a normally food-motivated dog refusing food it usually loves (per the body-language research) — it can no longer learn in that state. Other signs include freezing, a hard fixed stare, lip-licking, yawning, turning away, or trying to leave. The moment you see escalating stress, calmly add distance or lower difficulty and let the dog recover. All desensitization, socialization, and reactivity work depends on keeping the dog under threshold.
Capturing, luring, and shaping›
The three main ways to get a behavior so you can mark and reward it. Capturing: wait for the dog to offer the behavior on its own (lying down, a calm settle, a check-in) and mark it the instant it happens. Luring: use a treat at the nose to guide the dog into position (e.g., raising it over the head for a sit), then fade the lure early — after only about 3–5 reps switch to an empty-hand signal, and add the spoken cue last; food left visible forever becomes a bribe, not a cue. Shaping: build a complex behavior by marking successive small approximations — rewarding closer and closer attempts until you reach the full behavior. All three rely on the marker to pinpoint the right moment.
Cooperative care›
Teaching a dog to voluntarily participate in its own grooming, handling, and veterinary care instead of being restrained through it. The dog is given a start-button or consent behavior — a chin rest in your palm, or a settle on a mat — that means "I'm ready; continue." If the dog lifts its chin or leaves, you stop immediately. Giving the dog this control dramatically reduces struggling, fear, and the risk of a defensive bite, and it makes a lifetime of nail trims, ear cleanings, fold care, and exams low-stress. It's built with desensitization and counter-conditioning, and you always end while the dog is still happy — never finish a procedure over a struggling dog.
Sensitive period (socialization window)›
The early developmental window — roughly 3 to ~14 weeks of age, with the most receptive stretch front-loaded into the early weeks — when a puppy most readily forms lasting positive (or negative) associations with new people, dogs, surfaces, sounds, and experiences. Calm, positive, controlled exposures during this window build a confident, resilient adult; experiences missed or made frightening here are much harder to fix later. Because under-socialization causes far more behavior problems (and re-homing) than early disease exposure does, AVSAB advises starting safe socialization during this window — using clean surfaces and known healthy dogs, and continuing the veterinary vaccination series — rather than waiting until it has closed.
Trigger stacking›
The way multiple stressors pile up and add together faster than the dog can recover, pushing it over threshold (above) even when no single event would have. A dog might tolerate a noisy truck, a strange dog, or a child's grab on their own — but all three within a few minutes can "stack" into a snap or a bite that looks like it came out of nowhere. Stress hormones can stay elevated for a long time after an upsetting event, so a dog that had a hard morning has a lower fuse all day. The takeaway: watch for accumulating stress, give your dog space and recovery time, and don't ask for more after a tough experience.
Similar breeds
Comparing breeds, or planning the next dog? Each guide below is composed the same force-free way, from that breed's own traits.
Socialization Checklist
Protective, territorial behavior is innate in this breed — which means socialization is not optional enrichment, it is preventive medicine. Your goal is a confident dog whose default reaction to a stranger, a strange dog, or a strange situation is neutral (“noted, not my problem”), not suspicious or reactive. You build that default by deliberately front-loading broad, positive exposure during the primary socialization window (roughly weeks 8–16) and continuing it hard through adolescence, when guardian breeds often re-test the world.
The universal how-to of socialization (pairing, thresholds, reading stress) is covered in the shared method library — this is the breed-specific dial: for a Giant Schnauzer, turn the friendly-stranger and novelty exposure up higher and start it earlier than you would for an easygoing breed.
0/9
How to Use This Socialization Checklist
Socialization is not about exposure for its own sake — it is about building positive, optional, sub-threshold associations with the everyday world during your dog's most receptive developmental period. The goal of every item below is a dog who notices something new and thinks "that predicts good things," not a dog who is dragged up to it and forced to cope. Quality beats quantity: a handful of calm, happy exposures where your dog chooses to investigate is worth more than a busy outing that overwhelms them.
The primary socialization window is in early puppyhood, and exposures front-loaded into that window pay the biggest dividends — but socialization is a lifelong maintenance habit, not a box you tick once. Adolescent and adult dogs still benefit from ongoing, gentle, positive exposure, and a second period of heightened wariness is common later in development. Work the list at your dog's pace and keep going long after puppyhood.
The core method: positive, optional, under threshold
Apply the same four-part method to every item on every list:
The Socialization Checklist — People, Dogs & Animals, Places
Work through these categories at low intensity, pairing each exposure with food or play, and letting your dog set the pace. The aim is for your dog to see each item from a comfortable distance and feel good, then optionally choose to investigate — not to meet, touch, or be handled by every one. Repeat the items that are easy in new locations (dogs do not automatically generalize), and give extra, gentler attention to anything that worries your dog.
People (variety is the point)
Dogs do not see "people" as one category — they see specific shapes, movements, and sounds. Expose your dog, from a comfortable distance and with good things happening, to as many kinds of people as you can.
0/11
Other dogs and animals
The goal is calm neutrality around other animals — not that your dog plays with everyone. Many well-socialized dogs are happiest simply ignoring strange dogs. Prioritize a few good experiences with known, healthy, appropriately-matched dogs over chaotic free-for-alls.
0/7
Environments and places
New places stack novelty — unfamiliar sights, sounds, smells, and footing all at once. Start with quieter versions and build up, always keeping the option to leave.
0/9
Surfaces and footing
Confident dogs are comfortable walking on many textures. Let your dog explore varied footing by choice — reward any voluntary step onto a new surface and never drag a hesitant dog across one. Always keep footing safe and non-slip; a frightening slip can create lasting wariness.
0/8
Sounds
Sound sensitivity is one of the most common — and most preventable — fears in dogs. The method is the same: start quiet, pair with good things, and raise the volume only while your dog stays relaxed. Recorded sound libraries are useful because you control the volume; play them softly during meals or play and turn them up gradually over days, never all at once.
0/10
Handling and cooperative care
Routine handling — for grooming, nail care, and veterinary exams — is a lifelong necessity, so teach your dog to enjoy it now. Pair gentle, brief touch with treats, build duration slowly, and give your dog a way to say "pause." A consent or 'start-button' behavior (such as resting the chin in your palm) that means "I'm ready," where you stop the instant the dog lifts away, turns handling from something done to the dog into something done with the dog.
0/9
Novel objects
Unfamiliar moving, noisy, or oddly-shaped objects are a common source of startle. Let your dog investigate them by choice, from a distance, with the object still and quiet before it moves or makes noise.
0/8
Startle-and-Recover & Keeping Exposures Sub-Threshold
A well-socialized dog is not one that never gets surprised — it is one that bounces back quickly. Building good recovery from small startles is as important as the exposures themselves. Surprises will happen; what you want to rehearse is the pattern of startle, recover, carry on, so resilience becomes your dog's default.
Startle-and-recover routine›
Step by step
How to tell when you've gone too far
"Under threshold" means your dog notices the trigger but stays relaxed enough to eat, engage, and choose. The moment you see escalating stress, you are over threshold and learning has stopped — calmly lower the difficulty. Learn to read the early, quiet signals so you act on them before the loud ones appear.
0/4